Sunday, January 31, 2016

Birthday Balloons

Well, I got ahead of the game on my homework, so I took some time to craft.  I made a nice, pretty, girly birthday card.


The card is 5 1/2"x4 1/4" and made of a pale yellow card stock.  The I cut some pink polka dot paper at 5 1/4"x4."  The yellow strip in the back is 1 3/4"x4."  I then cut a white piece of card stock at  1 1/4"x4" to layer on top.


I used a stamp from my stash for the image.  I stamped it on a piece of 4 3/4"x1 3/4" white card stock.  I then stamped the balloon part three more times on three different patterned card stocks.  I cut those out and paper-pieced the balloons.  I matted the white piece with some dark pink card stock, cut at 4 7/8"x1 7/8," then a pale pink piece cut at 5"x2."  I used a glittery pink pen to touch-up the dots along the balloon strings.  Finally, I added some pink and yellow pearls.


The sentiment is from Jaded Blossom's So Many Birthdays 2 stamp set.  I modified the one-line sentiment to be two lines so that it would fit on the white strip I put on the card earlier.

I made this for the following challenges:
Just Us Girls: tic tac toe (I used the middle row across - pearls, stamps, paper-piecing)
Cute Card Thursday: feminine creation

Thursday, January 28, 2016

Birthday Kitty

I made another kitty card today, this one for a birthday.


The card is 5 1/2"x4 1/4" and made of black card stock.  I cut a wood grain layer at 5 1/4"x4" and a grey polka dot layer at 4 1/4"x3."  I used the insert shape feature in Cricut Design Space to cut the circles and the stars.  The black circle is 3 1/4," the wood grain circle is 3," the larger star is 1 1/4," and the smaller star is 3/4."  I then  covered the stars with yellow glitter and popped up the smaller one with foam tape.


The banner in the background is from "The First Few Years" cartridge.  I cut it from silver glitter card stock at 1"x3."  The kitty is from SVG Cutting Files.  It is called Chunky Cat with Present and Party Hat.  I used foam tape to pop up the feet and also to pop up the kitty on the circle.  I also covered the eyes and nose with glossy accents.  I added some yellow pearls to the party hat as well.  I finished off the card with a sentiment from the So Many Birthdays stamp set by Jaded Blossom.


I made this for the following challenges:
Crazy 4 Challenges: add some "pop" to your card (I popped up some of the elements)
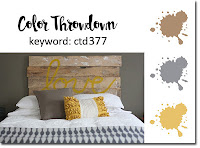
Color Throwdown: color combination

Friday, January 22, 2016

Valentine's Kitty

Here it a Valentine's card I managed to make today:


The card base is 4 3/4"x5" and is made using the "Wild Card" cartridge.  The heart layers are also from this cartridge.  The teal one is 4 1/2" and the white one is 4."


The kitty is from SVG Cutting Files.  It is called Hipster Kitty and is cut at just over 3" tall.  I adhered it to the card with foam tape.  The face on the kitty was made using some Peachy Keen Stamps.  I used Large Bear Facial Features for the eyes and Teddy Bear and Reindeer Face Parts for the mouth.  I covered in the eyepiece of the glasses with glossy accents and added a little Wink of Stella to his nose.


The sentiment and stamped hearts are from Jaded Blossom.  The sentiment is from 100% Hipster and the hearts are from Heart Splatters.  I stamped the hearts in pearlescent poppy ink by Tsukineko. 


For the inside of the card I used a Jaded Blossom stamp from the Foxy set.


To finish off this card I also made a matching envelope.  This came from the "Wild Card 2" cartridge.

I made this for the following challenges:
SVG Cutting Files: Valentine theme
Cute Card Thursday: masculine 


Wednesday, January 20, 2016

The Rose

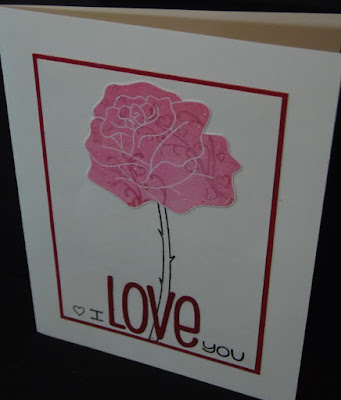
Here is the pretty Valentine's Day card I made today:


The card base is 5 1/2"x4 1/4" and made of white card stock.  I cut a piece of dark red card stock at 4 1/2"x3 1/4," then a piece of white card stock at 4 3/8"x3 1/8."

The stamps are from Jaded Blossom.  The rose is from their new Roses set.  I covered the rose in pink ink.  I then Took one of the stamps from the Valentine Panels set, covered it in red ink, and "kissed" that onto the rose stamp.  Once I did that, I stamped my rose image onto a piece of white card stock.  That way you get some pattern on an otherwise plain image.  I then fussy cut around the rose image, leaving a small white border.  I then covered all the pink with Wink of Stella because I wanted the rose to shimmer and sparkle.

The stem of the rose was stamped on the white panel that was cut earlier.  I used the Alphabet Dies from Jaded Blossom for the word "love."  The little heart is a part of one of the panels from Valentine Panels and the "I" and "you" are from 100% Hipster, also both from Jaded Blossom.


I made this for the following challenges:
My Sheri Crafts: fussy cutting
Scrappy Moms Stamps: sparkle and shine
The ABC Challenge: Z is for zero (embellishments)
Less is More: kissing technique

Thursday, January 14, 2016

Let Them Eat Cake!

I decided to a little crafting today and made some very quick and simple cards.  I made all four of these in just under an hour.


The card bases are all pre-made ones from DCWV.  I chose some really fun, cheerful colors.


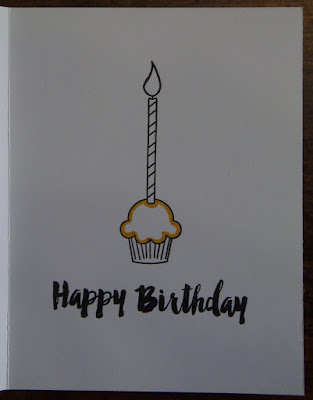
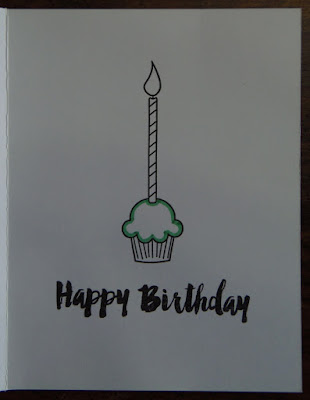
I then used one of the metal dies from the Panel Dies set by Jaded Blossom to cut the opening in the front of the card.  I used the cupcake from the Birthday Panels stamp set, also by Jaded Blossom, to stamp my image on the inside of the card, so that it showed through the opening.

The sentiment on the front is from the Sweet Birthday Wishes stamp set by Jaded Blossom.

I added a little color to the cupcakes by outlining their icing with some glittery metallic markers.  I finished off the outside with some coordinating sequins.


I also stamped a sentiment on the inside, this one from the So Many Birthdays 2 stamp set by Jaded Blossom.

I made this for the following challenges:
CASology: cue word - open
Seize the Birthday - anything goes with the option of clean and simple
Cute Card Thursday: a bit of fun


Sunday, January 10, 2016

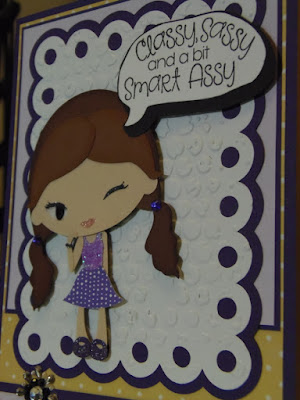
Sassy

Since I start school tomorrow I had to make sure that I got a little crafting in today.  This is the card I made:


The card is 5"x7" and made of dark purple card stock.  The yellow polka dot card stock is 4 3/4"x6 3/4."  The dark purple square is 4 1/2"x4 1/2" and the light purple square is 4 3/8"x4 3/8."  The background mat is made with the "Elegant Edges" Cricut cartridge.  I cut it at 4" wide.  It is embossed with the Sizzix Bubble Wrap embossing folder.  The scallop border is from the "Holiday Cakes" cartridge.  I cut it at 5" wide, then added a small strip of dark purple card stock at the top of it.


The girl is from SVG Cutting Files, it is called Sassy Thing.  She is cut at 4" tall.  I added some purple glitter to her top and used some purple gems for her hair.  I used Wink of Stella on her lips, shoes, and eyelashes.  I covered her eye and mouth with glossy accents.  I also inked her hair with Distress Ink by Tim Holtz.  She is adhered to the card with foam tape.  


The sentiment is stamped on a speech bubble from "Photo Booth Props."  I cut it at just over 2" wide and hid the words that were supposed to be cut with the bubble.  I then used a Jaded Blossom stamp for the sentiment.  It is from the Sassy Pants set.  I used foam tape to adhere this as well.


I cut another piece of the yellow polka dot card stock at 4 3/4"x6 3/4."  I then cut a piece of dark purple card stock at 3"x5" and some white card stock at 2 7/8"x4 7/8."  I used another stamp from the Sassy Pants set by Jaded Blossom for the sentiment.

I made this for the following challenges:
Crazy 4 Challenges: bubble (I used a speech bubble & the bubble wrap embossing)
Pile It On: use something that starts with the first letter of your first name (purple & polka dots)
Seize the Birthday: anything goes
Naughty or Nice Challenges: silly (this sentiment makes me giggle)

Saturday, January 09, 2016

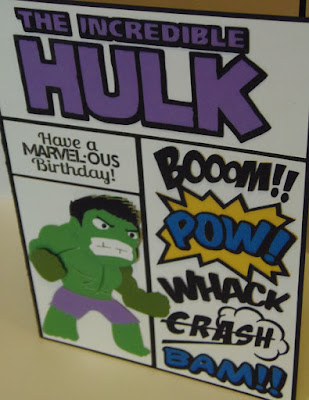
Hulk Smash!

Isn't this such a fun card?


The card base is 5"x7" and made of black card stock.  I used the insert shape feature in Cricut Design Space to create the white blocks to make the comic book page look of the card. I inserted four squares, but changed their size with aspect ratio off to create rectangles. 


The Hulk is an svg from a blog hop from SVG Cutting Files, and is not available for purchase.  I cut it at 3 1/2."


The title is an image that I uploaded into Cricut Design Space and created into a cut file.  It is cut at 1 3/4."


The comic words on the right are from the "Word Collage" cartridge.  They are cut at 4 1/2"x2 1/4" (approximately) and I turned off the aspect ratio to get the size to fit the space.


The sentiment is from Scrappy Moms Stamps.  It is from the Fan-tastic! set.


I made this card for the current challenge at The Friday Mashup.  The challenge is to create a project with a superhero and a storybook layout.