Saturday, March 30, 2013

Rosette Wreath

I have been trying to figure out something new to display at work.  My last display was for St. Patrick's Day and it came down on the 18th of March.  So, I have been needing something else to put up.  I knew I wanted to put up something that felt springy or summery, but other than that I had no inspiration.  Well, I finally came up with this wreath:
 
I used Ribbons and Rosettes and cut out 12 rosettes of varying sizes and shapes.  I used patterened paper from the Flower Shower Stack by DCWV for all my rosettes.  I put them all together and adhred the rosettes to a ring I had cut out of cardstock to act as my wreath form.  I then used Tablescapes: Spring and Summer to cut out the butterflies and flowers.  I then added some buttons and pearls to finish it off.


Wednesday, March 27, 2013

Dear Santa

It is finally starting to warm up around here.  So, apparently I thought  Christmas card was in order.  ;)  The card I made today is a clean and simple one and only took about 15 minutes to put together.  Hope you enjoy!


The card is 4 1/2"x6 1/4."  I used Just Because Cards for the card shape.
The Santa die cut is from the Silhouette Studio and the stamp is from My Craft Spot and is stamped in pink petunia ink by Tsukineko.
 
I made this for the following challenges:


Tuesday, March 26, 2013

Perfect Sentiments: "Brides or Babies"

It is challenge time again at The Perfect Sentiment!
 
The challenge: create a card with a sentiment on the front
The twist: use a wedding or baby theme for your card

Our sponsor this week is 2 Cute Ink.  The winner will receive 3 free digis!
 
Here is the card I have created for our challenge:
My card is 5"x7" and I used black cardstock for the base.  I cut a piece of white cardstock at 4 3/4"x6 3/4."  I ran the white cardstock through the Cuttlebug with one of the folders from the Wedding Suite collection. 
 
The "Mr. & Mrs." cut is from Sweethearts and cut at 3."  I used foam tape to adhere it to the card for some added dimension.  I then covered it with glossy accents and added star dust Stickles to the center of the heart.
 
I tied a bow in some black satin ribbon and adhered it with a glue dot under the sentiment.  I then finished the card by adding some white Liquid Pearl dots where all the cross-hatch lines cross.
 
There you have it...sweet and simple!  Now see what the rest of the design team has created to inspire you by heading on over to The Perfect Sentiment.  Then create your own card for the challenge and link it up.  I can't wait to see what you create!


Saturday, March 23, 2013

Christmas Birds

Another Christmas card today.  This one is 5"x7."
 
Supplies Used:
Cardstock: The Paper Studio
Patterned Paper: DCWV - "My Sunshine Stack"
Die Cut: "Snow Tree with Birds" by Silhouette Studio
Ribbon: Making Memories
Ink: Onyx Black by Versafine
Miscellaneous: Stickles by Ranger and stamp is from my stash
 
I made this for the following challenges:

Wednesday, March 20, 2013

Happy Sun

Hopefully this card will put a smile on your face!
Supplies
Card: 4 1/2"x6 1/4"
Cardstock: The Paper Studio
Printed Paper: Hot Off the Press
Embossing Folder: "Cloudy Sky" by Darice
Die Cuts: "Labels Eight" by Spellbinders and "Happy Sunshine with Clouds" by Silhouette Studio
Inks: Wild Honey Distress Ink by Tim Holtz and Onyx Black by Versafine
Stamps: Simple Sallies Face Assortment and July Stamp of the Month by Peachy Keen
Other Supplies: White Gel Pen by Sakura, "Wheat" marker by Zig, Glossy Accents by Ranger, and foam adhesive by Scotch
I made this card for the following challenges:


Tuesday, March 19, 2013

Perfect Sentiments: "Fairies or Butterflies"

It's Wednesday, and that means - challenge time at The Perfect Sentiment!
 
The challenge: create a card with the sentiment for the occasion of your choice
The twist: use a butterfly or fairy on your card
 
We have two sponsors this week!
The first one is Pattie's Creations and the winner will receive 3 free digis!
 
The second is Crafty City and the winner will receive a $5 gift voucher!
 
Here is what I created for this challenge:
My card is 4 1/2"x6 1/4."  I used a dark teal cardstock for the card base.  I cut some white cardstock at 4 1/4"x6."  I wrapped the white cardstock with some teal ribbon and tied it in a bow, then adhered it to the card base. 

I stamped three butterflies in three different shades of teal ink and heat embossed them.  I matted them with three different shades of teal cardstock and adhered them to the card base.  The sentiment is from Paper Smooches and stamped in a dark teal ink.  For more added texture, I covered the sentiment with a clear shiny gel pen.
 
Now, head on over to The Perfect Sentiment and check out the creations from the rest of the design team.  Then be sure to create your own card with a butterfly or fairy and link it up.  I can't wait to see what you create! 


Thursday, March 14, 2013

Simple Ornaments

I have not been working on my Christmas cards as much as I would like, but I did manage to create one this week.
This is a really simple one, but I like how it turned out none the less.
 
I used the color challenge at 52 {Christmas} Card Throwdown to inspire my card. The color challenge was black, white, and metallic gold. 
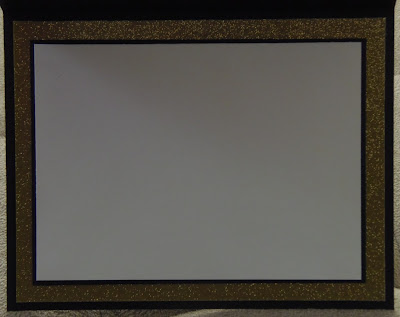
My card is 5 1/2"x4 1/4."  I made the card base from black cardstock.  I cut some glittery gold cardstock at 5 3/8"x4 1/8."  I then cut a black mat at 5 1/8"x3 7/8" and my white piece is 5"x3 3/4."  I stamped the three ornaments across the top of the card.  I then hand drew the string they are hanging from.  I "colored" the ornaments with golden rod Stickles and stamed the sentiment to finish it off.
 
I also finished the inside of this card.  All my interior pieces are cut at the same sizes as the ones of the front.


Tuesday, March 12, 2013

Perfect Sentiments: "Easter Bling"

Time for another Perfect Sentiments challenge!
 
The challenge: create a card with an Easter sentiment
The twist: add some bling 
 
Our sponsor this week is Stitchy Bear and the winner will receive a $10 gift voucher.
 
Here is the card I made for this challenge:
 The card is 4"x9" and made from white cardstock.  I cut a yellow mat at 3 7/8"x8 7/8."  The grass cardstock is 3 5/8"x8 5/8."  The chicks are cut using the Silhouette Cameo.  They are 2 1/2."  I covered them in yellow glitter and used some brown gems for their eyes.  I adhered two of them with foam tape, which are two different thicknesses.  The sentiment is from Scrappy Moms Stamps.

Now that you have seen what I have created, head on over to The Perfect Sentiment and see the rest of the design team's creations.  Then link up your creation.  I can't wait to see what you create!


Lucky Shamrock

How cute is this guy's face?!  I just love it!
This card is 5"x5" and the card base is a dark green cardstock.  I cut a black mat at 4 3/4"x4 3/4" and then some green paper, with a linen-like print to it, at 4 5/8"x4 5/8."  I cut another black mat at 4 1/8"x4 1/8" and some green argyle paper at 4"x4."  I used a stamp from Peachy Keen Stamps for the sentiment and stamped it in black ink in the upper left corner.  I also added three black pearls to the remaining corners.
 
I used Paper Doll Dress Up for the shamrock.  The black one is cut at 4" and the green polka dotted one is cut at 3 1/2."  I layered them together and adhered them to the card with foam tape.  I used another Peachy Keen stamp for his face.  I colored in the mouth and tongue with markers and used a white gel pen on his eyes and tooth.  I also covered the eyes, tooth, and tongue with glossy accents.  I finished off my little guy with a black baker's twine bow.
 
I made this card for the following challenges:


Monday, March 11, 2013

Little Darling

This adorable card is 5 1/2"x4 1/4."  I used brown cardstock for the card base.  I cut some multi-colored polka dot cardstock at 5 3/8"x4 1/8."  I then cut more brown cardstock at 4 7/8"x3 5/8."  I cut some white cardstock at 4 3/4"x3 1/2" and then embossed it with the Juli's Garden embossing folder.  I added some pearls to the middle of the flowers.
 
I used Kate's ABCs for my cute little girl pushing her buggy.  She is cut at 3 1/2."  I added pearls to the flowers on the ground and the flower on her pocket.  I adhered her to the card with pop-dots.  The sentiment is from Scrappy Moms Stamps.  I cut the cardstock that it was stamped on into a banner and ahered it to the card.
 
I made this for the following challenges:


Friday, March 08, 2013

Picture Frame

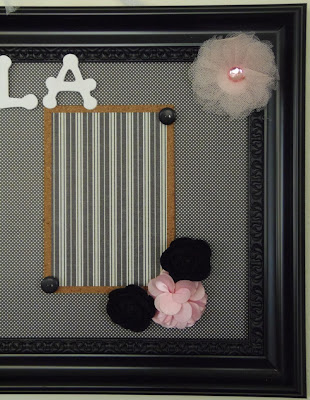
I made this for my cousin, she and her husband just recently had a daughter.  I have been wanting to make something for a while, and finally came up with something. 
 
I got a 10"x24" picture frame and took out the glass.  I covered the back with scrapbook paper and adhered three pieces of cork, cut at 4 1/2"x6 1/2."  I put some 4"x6" pieces of scapbook paper on the cork.  They can use that as picture matting with a 3 1/2"x5" picture or cover it up competely with a 4"x6" picture.  I glued buttons on to some tacks so they can add pictures of their daughter and replace them easily.
I added some flowers to the bottoms of the cork pieces, as well as the top corners of the frame.  The flowers are pre-made and I got them in the scrapbook section of JoAnns.  I painted some wooden letters with white acrylic paint.  I then adhered them to the frame with some foam adhesive.  I hung the frame with some tulle, tied in a bow.


Wednesday, March 06, 2013

Spring Wreath

Since we just got even more snow the other day I thought I should make something that reminds me that spring really is around the corner!
 
I covered a Styrofoam wreath with green Fun Fur by Lion Brand.  I then took the flowers off a spring bush and stuck them in the wreath.  I painted some wooden letters with alizarian crimson acrylic paint, then covered them in some glitter.  I cut some pink patterned cardstock at 3 1/2"x12" and and some patterned yellow cardstock at 2 1/2"x12."  I adhered the letters to the cardstock and adhered that to the wreath.  I wrapped a ribbon around the top of the wreath and tied part of it off in a bow for hanging.
I think it is perfect for spring!  Now, if only the real thing would arrive...I am quite tired of snow!


Tuesday, March 05, 2013

Perfect Sentiments: "Going Green with a Touch of Gray"

Time for another challenge at The Perfect Sentiment!
 
The challenge: create a card with a sentiment for the occasion of your choice
The twist: use the following colors on your card
 
(light green, dark green, gray)
 
 
This week we are sponsored by Robyn's Fetish.  The winner of the challenge will receive 5 free digis!
 
This is what I created for this week's challenge:
The card is 4 1/2"x6 1/4."  I used some light gray cardstock for the card base.  I cut some dark green cardstock at 4 1/4"x6" and then some green/white chevron paper at 4 1/8"x5 7/8."  I cut  a strip of dark gray cardstock at 1 1/4"x5 7/8" and a strip of light gray cardstock at 1"x5 7/8."  I stamped the sentiment and added some lime Stickles to the heart.
 
The dragon is from the digital cartridge Fantasy.  I cut it at 3 1/2."  I covered the spinal spikes with glossy accents and used some small black pearls for his eyes.  I adhered him to the card base with pop-dots for some added dimension.
 
Hope you enjoyed my card.  Now head on over to The Perfect Sentiment to see what the rest of the DT has created.  Then be sure to link up your card.  I can't wait to see what you create!


Sunday, March 03, 2013

Twinkle, Twinkle

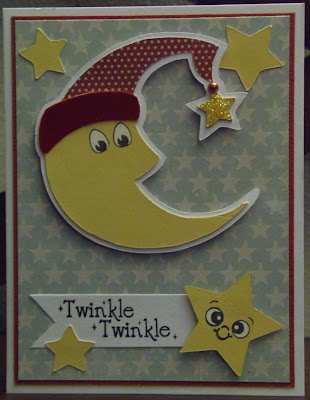
This card is 5 1/2"x4 1/4" and made from white cardstock.  I used a brick red cardstock, cut at 5 1/4"x4," for the mat.  I then cut some blue star cardstock at 5 1/8"x3 7/8" as my background.  The moon was cut from Campin' Critters at 3."  I flocked his hat band and added yellow Stickles to his star.  I gave the moon some Peachy Keen eyes.  The smaller stars are 3/4" and 1."  The larger star with the Peachy Keen face is 1 1/2."  All the stars are cut from George and Basic Shapes.  The sentiment is from Scrappy Moms Stamps and stamped on a white banner.  The moon and largest star are adhered with foam tape.
 
I cut more of the brick red cardstock at 5 1/4"x4" and more of the blue star cardstock at 5 1/8"x3 7/8."  I cut a strip of red cardstock at 4"x1 1/2" and some white cardstock at 4"x1 3/8."  The sentiment is a rubber stamp that I found in my stash.  The inside star is 1" and I gave it a little Peachy Keen face.
 
I made this for the following challenges:
Peachy Keen Stamps: card with stars
The Friday Mashup: baby card with colors - pool party, real red, so saffron, and a neutral