Showing posts with label Mickey Font. Show all posts

Monday, August 05, 2013

Mickey Cartridges - Creation #9

I have the final two centerpieces for you today!  I have finally finished the Donald and Daisy centerpieces.


And just like all the others, I used "Mickey Font" for the mouse ears and "Mickey and Friends" for the names and characters.  The mouse ears are cut at 5."  The name Donald is cut at 1" and the name Daisy is cut at  1 1/4."  The larger characters on both centerpieces are cut at 5" and the smaller of them are cut at 3."


Saturday, August 03, 2013

Mickey Cartridges - Creation #8

Here is the next centerpiece for the party, Goofy.  Now I only have two more left to make, Donald and Daisy.


Just like all the others, the mouse ears are from "Mickey Font" and cut at 5."  The name is from "Mickey and Friends" and cut at 1 1 /2."


The three images of Goofy are all from "Mickey and Friends."  The two larger are cut at 5" and the smaller is cut at 3."


Friday, August 02, 2013

Mickey Cartridges - Creation #7

Here is the Minnie Mouse centerpiece:
 
 
The mouse ears are from "Mickey Font" and everything else is from "Mickey and Friends."
 
 
The larger Minnie's are cut at 5" and the smaller one is cut at 3."


Monday, July 29, 2013

Mickey Cartridges - Creation #6

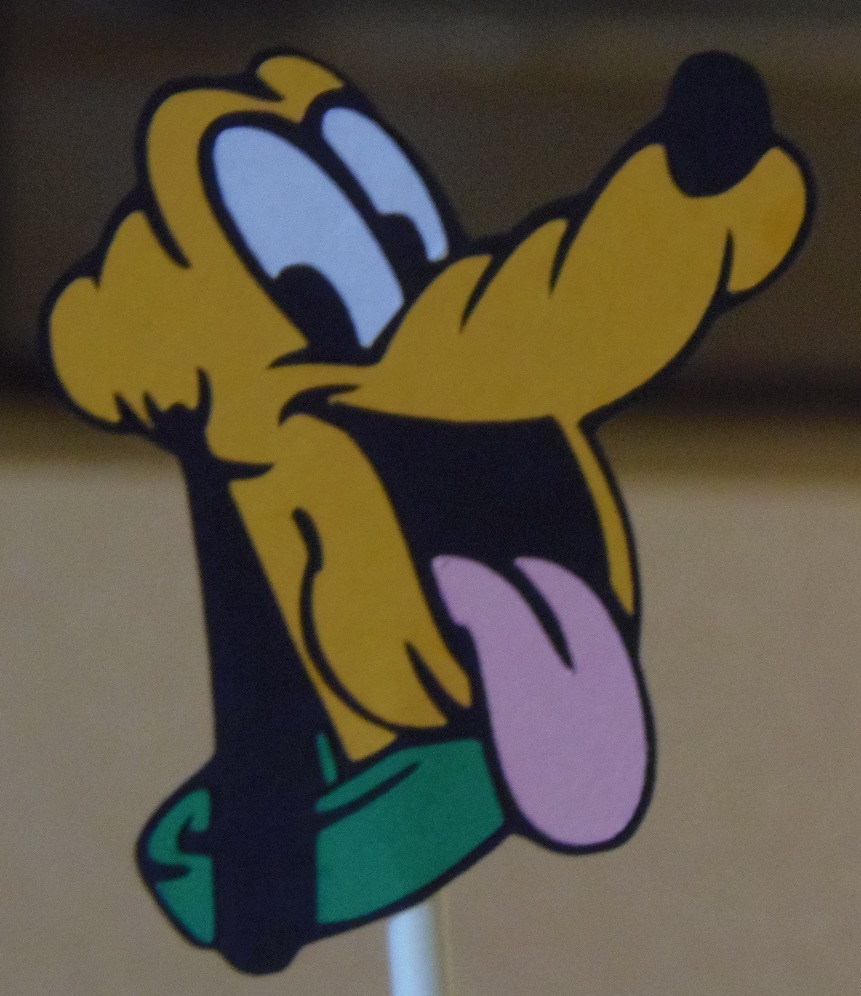
Finally, another centerpiece made.  This one is featuring Pluto!
 
I used the same sort of idea that I did for my Mickey centerpiece and will be using for my remaining ones as well.
 
The mouse ears are from "Mickey Font" and cut at 5."  The name is from "Mickey and Friends" and is cut at 1 1/4."  I placed the name on a white strip cut at 1 1/2" and trimmed to fit the ears.


The smallest Pluto was cut at 3" and the other two at 5."  They are all from "Mickey and Friends."  I adhered them all to lollipop sticks and stuck them in my mason jar.

Saturday, July 27, 2013

Mickey Cartridges - Creation #5

 I have finished the first of the individual character centerpieces.  This is the one of Mickey Mouse.


I used "Mickey Font" for the mouse ears, they were cut at 5."  I used "Mickey and Friends" for all the other pieces.  The name is cut at 1 1/4."  I used Cricut Craft Room to hide the word mouse in the name and then sized it to fit into the mouse ears.  I cut a white strip of cardstock to put the name on, then trimmed it to fit the mouse ears.


The two larger Mickey characters were cut at 5" and the smaller one was cut at 3."  The two larger Mickeys can be found on pages 80 and 81 in the handbook.  The smaller Mickey is on page 108.
 
I am entering this in the current Stuck On U Sketches die cut challenge, "Disney". 


Thursday, July 25, 2013

Mickey Cartridges - Creation #4

Now that I have finished the invitations and the thank you cards I am working on the centerpieces for the birthday party.  I am making one main centerpiece for the cake or food table and then six other ones for the tables that everyone is sitting at.  I was given free reign in making the centerpieces.  I came up with making the main centerpiece a mix of all the Mickey and Friends characters and on each table a centerpiece devoted to each character.
 
Here is the main centerpiece:


I used three Styrofoam balls to create my mouse head, which I then painted black.  I stuck a lollipop stick in the bottom of it and then into the foam in the mason jar.  The number 3, which is the age of the little girl, is from the "Mickey Font" cartridge and cut at 2 1/2."

I used the "Mickey Font" cartridge for all the characters in the centerpiece as well.  Each character head is cut at 2 1/2."  I layered them all together and adhered lollipop sticks to the back.  I then arranged them below the Styrofoam mouse head.


Tuesday, July 23, 2013

Mickey Cartridges - Creation #3

One of the women I work with just hit 10 years of working at JoAnn Fabrics.  We thought we would do something for her, so one of my other co-workers is getting cupcakes and I made a card for her.
 
 
The card is 6"x6" and made from white cardstock.  The blue mat is 5 3/4"x5 3/4."  I created my quilt block from 1 1/4" squares of patterned cardstock.  All the patterned cardstocks came from the Crafty Stack by DCWV.  I got this stack about 3-4 years ago at JoAnn's and have never used it.  I thought it was about time.  I just love the yellow cardstock with the little buttons!
 
I used "Mickey Font" for my number 10.  I cut it at 2 1/4" and used both the shadow and regular features.  I adhered it to the card with pop-dots.  I then added some faux stitching to the number with a burgundy marker and also around the edge of the blue mat with white gel pen.
 
On the inside of the card I cut a red mat at 5 3/4"x5 3/4" and a white mat at 5 1/4"x5 1/4."  I added some faux stitching around the white mat with the burgundy marker.  The sentiment is from Paper Smooches and stamped in rhubarb stalk ink by Tsukineko.
 
I also stamped her name on the envelope.  I used more of the rhubarb stalk ink and letter stamps from My Craft Spot, the "Chunky Alphabet" set.