Thursday, March 31, 2011

Easter Bunnies

How cute are these little bunnies? I just love them and thought they were perfect for a cute little Easter card. The card is 4 1/2"x6 1/4." I used a cream cardstock for the card base. I cut some patterned cardstock, from the DCWV Downtown Loft Stack, at 4 1/4"x6." I cut a strip of dark brown cardstock at 4 1/2"x2 1/2" and punched the edges with an EK Success punch. I then cut a piece of ivory cardstock at 4 1/2"x1 1/2" and embossed it with the Mandarin Screen embossing folder. I adhered it down to the card base, then tied it with a ribbon I had in my stash. I cut a piece of dark brown cardstock at 4 1/8"x3 1/8" and some yellow cardstock at 4"x3" which I then embossed with the Swiss Dots folder. I stamped my bunnies on brown and cream cardstock and cut them out. I hand cut the felt for their ears. I used pop-dots to adhere the bunnies down. I stamped the sentiment using coffee bean ink by Tsukineko, the sentiment stamp is from My Pink Stamper, I don't remember where the bunny stamp came from. For the inside of the card I cut some dark brown cardstock at 4 1/4"x6" and some yellow cardstock 1/8" smaller than that. I then hand wrote the poem, I'm not sure who it is by. I also stamped the bunny ears at the bottom of the card. Enjoy!!
This card is for the following challenges:

Wednesday, March 30, 2011

New Home

My friends, who are getting married soon, just bought a new house and I thought I should send them a card congratulating them on that milestone. There were a couple of challenges that are perfect for that occasion so, I made this card, which is 5"x7." I used a white cardstock for the card base, then cut some red cardstock 1/8" smaller. I embossed the red cardstock with a Sizzix embossing folder, called Bricked. I cut a strip of glittery black cardstock, which is from Core'dinations, at 7"x1 1/2." I then used a Martha Stewart border punch on it. I wrapped it with some ribbon that I got at Michaels and added three rhinestones, which are from Bazzil. The flourishes are cut from Cindy Loo. The large black one is cut at 2" and the yellow one is cut at 1 1/2." The glittery yellow cardstock is from DCWV, the Glitter Stack. The plain cardstock is all from my stash, I don't know who the manufacturer is any more. I cut a mat from the glittery black cardstock at 3"x4 1/2, then cut some cream cardstock 1/4 smaller. The house is cut from Hoot 'n' Holler at 2 1/2." I embossed the roof with the Cuttlebug Tiny Mosaic folder. The sentiment is actually two seperate stamps from Close to My Heart. I used some foam adhesive to adhere that all down to the card. I made this for the following challenges:

Tuesday, March 29, 2011

Piglet

This is a 5"x5" card. I used a dark purple cardstock for the base. I trimmed a piece of glittery patterned cardstock at 4 3/4"x4 3/4" and piece of white glitter cardstock at 4" square. I adhered the white square to the floral one and wrapped a patterned ribbon around it. I then tied a piece of purple ribbon around the patterned one. Piglet is cut from Pooh & Friends at 4." The flowers are also from Pooh & Friends, they are the icon feature of the Tigger face. I cut them at 1 1/2" and adhered them to Piglet so they look like he is holding them behind his back. I added some pink gems as the centers of the flowers. I cut a strip of pink cardstock at 3"x1/2." I then cut it to look like a banner. I stamped the "happy birthday" sentiment in eggplant ink by Tsukineko. I attached it to the card, using adhesive only on the ends, so there is a rise in the middle. The flowers are from Prima and I used timeless lilac and coral reef Glimmer Mist on them to give them a shimmery colored look. I attached the flowers together with a pearl brad, then used a pop-dot to adhere them to the banner.

This card is for the following challenges:

Mojo Monday: sketch #184


BBTB2: Disney themed


Birthday Sundaes: spring birthday

Monday, March 28, 2011

King of My Heart

Here is a 5"x5" card I made this evening. I used a red cardstock for the card base. I cut a piece of blue cardstock at 4 1/2" square and brown cardstock at 4 1/4" square. I then embossed the brown square in my Cuttlebug, using the Tartan embossing folder. My cute little lion is a digi stamp from Cooking With Cricut. I colored him in with my Prismacolor colored pencils and then cut him out. I used pop-dots to adhere him to the card for some dimension. I added some glossy accents to his nose and yellow Stickles to his crown. For the inside of the card I cut a piece of the blue cardstock at 4 3/8" square and some cream cardstock at 4" square. I then stamped my sentiment, which is from Inkadinkado, with coffee bean ink by Tsukineko. I then heat embossed it using clearn embossing powder. I think this will be the perfect anniversary card for my husband! I made this card for the following challenges:

Flower Child

This card is 4 1/2"x6 1/4," made from white cardstock. I cut some green floral patterned paper at 4 1/4"x6" and adhered it to the card base. I then cut a strip of plaid patterned cardsdtock at 4 1/2"x2." I used George and Basic Shapes to cut the ovals. The striped one is cut at 5 1/2" and the white one is cut at 5." I stamped a flower image all around the white oval, using pink grapefruit ink by Tsukineko, and heat embossed it with clear embossing powder. The sentiment is stamped with hint of pesto ink by Tsukineko. The child with the flower is from A Child's Year, cut at 4." I used the shadow feature to cut the green layer, then the regular feature to cut the cream layer. I embossed the cream layer with the Swiss Dots folder. I then used some pop-dots to adhere the image to the card base. Enjoy!
I made this card for the following challenges:

Saturday, March 26, 2011

Stitched Flower


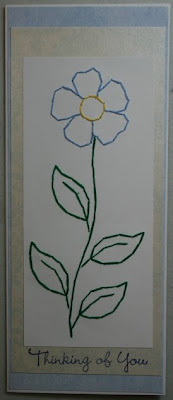
There is no Cricut or Cuttlebug on this card! Can you believe it? The card is 3 3/4"x9." I used a white cardstock for the card base. I then cut some mottled blue paper 1/8" smaller and mounted it on the card base. I cut some blue toile cardstock at 3 1/2"x8" and mounted that to the card. I used a stencil from Bazzil to create the flower, which I stitched using some floss. The white cardstock is cut at 3"x6 3/4." I stamped the sentiment, which is from TPC Studios, to the toile cardstock, using night sky ink by Tsukineko. This is a super simple card, but I really liked the way the stitched flower turned out and wanted that to be the focus of the card. Enjoy!
I made this card for the following challenges:
Peachy Keen: sketch (I stretched it to fit a 3 3/4"x9" card)
365 Cards: "STW" - Stitching, Toile, White
Crafty Creations: "In Stitches"
ABC Challenge: Q is for Quilting/Sewing
My Sheri: Spring

Card Creations & More Challenge #6


It is Saturday and that means it is time for another So Saturday Challenge over at Card Creations & More!! This week's challenge is to use a patterned ribbon somewhere on your project.

I made an Easter card for this week's challenge. My mother asked me to create a card for her to give to her aunt for Easter. I asked her what she liked and she gave me some ideas, and I created this. The card is 5 1/2"x4 1/4." I cut some dark purple cardstock at 5 1/4"x4," and some yellow cardstock 1/8" smaller than that. I embossed the yellow cardstock with the Victoria embossing folder. I then tied the purple gingham ribbon around it and adhered it to the card base. The cross is cut from Easter at 4." I used a white cardstock for the bottom layer and a shimmery white cardstock for the top layer. I adhered the cross with pop-dots, then added some white pearls in the top corners.

The inside of the card was also created with the Easter cartridge. I cut some dark purple cardsock at 5 1/4"x4" and the yellow cardstock is cut 1/8" smaller. The flowers, in a light and dark purple, were cut from it at 2." I also cut the "Happy Easter" at 2." The shadow layer in dark purple and the regular layer in yellow. I then added some yellow Stickles to the sentiment.


Now that you have seen my creation for this week's challenge head on over to Card Creations & More and submit your project for the challenge! I can't wait to see what you come up with!!


Thursday, March 24, 2011

Floral Thank You

This card is 5"x5." The card base is made with cardstock from the Old World Stack by DCWV. I wrapped it with two pieces of pink grosgrain ribbon. I cut two circles from Mother's Day Boquet, one in dark blue at 3 1/2" and one in white at 3." I then adhered them to the card in between the two pieces of ribbon. The heart is from Sweet Treats and I made it into a tag by punching a hole in it. I inked it with some sunflower yellow ink by Tsukineko. I then added some more pink grosgrain ribbon to it. I stamped the sentiment on it, which is from Fiskars, using night sky ink by Tsukineko. The flowers are all cut from Mother's Day Boquet. I inked the edges of them all to give them dimension and layered them together. The pink flower has two layers of pop-dots on it to lift it up, the blue flower has one layer and the yellow one is adhered right to the card base. I finished it off with a ladybug button and added a little trail for it with a blue marker. I made this card for the following challenges:

Wednesday, March 23, 2011

Cute Little Dachshund

Here is a 5 1/2"x4 1/4" card. I used a shimmery green cardstock for the card base. I then cut some white cardstock at 5 1/4"x4" and embossed it with the D'vine Swirls folder. I cut the tree from Straight From the Nest at 5." I embossed the pink layer with a Sizzix folder called Woodgrain. The dachshund is from Paisley, cut at 2 1/4." I used pop-dots to adhere the dachshund to the card base. I added glossy accents to the nose and eyes of the dog, some glam pink Stickles to the flower on the dog and finished it off with some green gems on the tree.

I made this card for the following:
365 Cards: "Super Sketchy Sunday" - sketch
Alphabet Challenge: T for Tree
BBTB2: Paisley cartridge, dachshund cut
Cricut Cardz: spring card with pink, green, white


Go Hog Wild!

This is a 5"x5" card. I used some shimmery olive green cardstock for the base. I then cut some aqua blue cardstock at 4 3/4"x4 3/4," then ran it through my Cuttlebug with the Polka Dots embossing folder. I cut a 2"x2" square from the green, then cut it in half diagonally to make my corner triangles. I added some orange pearls in the corners. I cut a 3 1/4" square from an orange cardstock, then a 3" square from white. My pig was cut at 1 3/4" from "Just Because" Cards. I embossed the orange layer of the pig in the Swiss Dots folder, then pop-dotted him to the white square. I added four buttons, that remind me of pig noses, to the corners and some alphabet letters to spell out "oink." The sentiment is computer generated and mounted on the same orange cardstock as the pig and the orange square. The inside is layered with the aqua blue cardstock and white cardstock. The other half of the sentiment is in there as well, also mounted on the orange cardstock. The white and black cardstock is from my stash. The colored cardstock is all from the Cafe Mediterranean Stack by DCWV.
I made this card for the following challenges:


Sunday, March 20, 2011

Simple Get Well


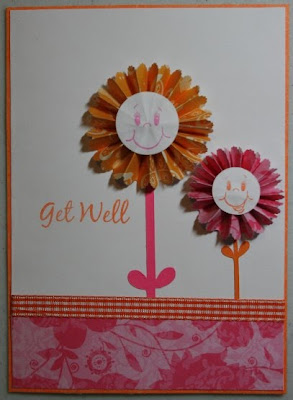
This is a 4 1/2"x6 1/4" card. I made it with white cardstock, then cut some orange mulberry cardstock the same size. I cut some more white cardstock 1/8" smaller and adhered it to the orange cardstock. The flowers are handmade, I used the tutorial from Splitcoast Stampers. I then cut white cardstock circles, one at 1" and one at 3/4." I then stamped them with some Peachy Keen faces, using tangerine and orchid pastel ink by ColorBox. The stems are cut from Walk in My Garden, the pink one at 2 3/4" and the orange one at 1 1/2." I adhered the stems to the card, then adhered the flowers. I cut a piece of patterned pink paper at 4 3/8"x1 1/2" for the bottom of the card, then wrapped a ribbon around it. I finished it off with my sentiment, which is stamped in tangerine ink by ColorBox.

I made this card for the following challenges:

Daisy


This card is 4 1/2"x6 1/4." I used white cardstock for the base, then layered on some yellow floral paper, cut 1/8" smaller. The strip of shimmery white cardstock was cut using George and Basic Shapes, at 6 1/4." I then embossed it with the Plum Blossoms Cuttlebug embossing folder. I wrapped it with some light blue ribbon and adhered it to my card base. The borders on either side are also cut in the same shimmery white cardstock. I used the Easter cartridge and welded two borders together with my Gypsy. Their length is 6 1/4." The flower is cut from Bloom at 3 1/2." I cut the white part twice, once in a normal white cardstock and once in the shimmery white cardstock. I adhered the plain white flower to the blue layer, then curled the petals of the shimmery white flower and adhered it down. I cut the yellow dot twice also. I adhered the first one down to the middle of the flower. On the second one I stamped my sentiment, which is from Fiskars, then heat embossed it with some light blue embossing powder. I then used pop-dots to adhere it to the flower. I wanted the sentiment to stand out, so I made it part of the image. I really like how it turned out!
This card is for the following challenges:
Card Patterns: sketch #107
Paper Sundaes: embossing
Sentimental Sundays: "Let's Get Sentimental"
Cricut Cardz: thank you card; Cricut cut border; yellow, blue, white
Cupcake Inspirations: cupcake photo

Thursday, March 17, 2011

Mother's Day Card

HAPPY ST. PATRICK'S DAY!!

This is a 5"x5" card made with purple cardstock. I cut a piece of green polka dotted paper 1/4" smaller and mounted it on the card base. I then cut three strips of the green/purple patterned cardstock 4 3/4" long and one of them at 2" wide and the other two at 1 1/8." I mounted them to the green paper with 1/4" between the top and bottom and each other. I cut two sqares at 1 1/8" and then cut them in half to form four triangles. I then used the Swiss Dots Cuttlebug folder to emboss them. I inked them lightly with spring pansy ink by Tsukineko and adhered them to the corners. I cut a piece of purple cardstock at 3 1/4" square and also embossed it with Swiss Dots and inked it. I adhered it in the middle of the card. I cut some cream cardstock at 3" square and inked the edges of it with peach pastel ink by ColorBox. I then used the "Mom Words" stampe by Stampendous on it, using pearlescent beige ink by Tsukineko. I covered it with some vellum and stamped the "Happy Mother's Day" sentiment, which is by My Pink Stamper, in purple hydrangea ink by Tsukineko on top of the vellum. I cut the orchid from Tie the Knot at 1 1/2." I used the blackout feature for the dark green and dark purple, then the regular feature for the lighter green and lighter purple. I used two different sized pop-dots to adhere the flower and leaves to the card.
I made this card for the following challenges:
  • Paper Playtime: Challenge #1 - green & purple
  • My Creative Time: Throwback Thursday - older cartridge & use green
  • Jitterbuggin': sketch & use green
  • Die Cuttin' Divas: "Unused & Unloved" - use a never used or rarely used cartridge and a cut you have never used (I rarely use Tie the Knot and have never used the orchid cut before)
  • Crafty Creations: Mother's Day
  • 365 Cards: Ad Inspired (I loved the greens, the clean lines and the plant in the background)


Wednesday, March 16, 2011

Easter Chicks

This is a 4 1/2"x6 1/4" card. I made the card base with white cardstock, then cut the pink striped cardstock 1/4" smaller. I edged it in glam pink Stickles. I cut a triangle from white cardstock and stamped my sentiment, from My Pink Stamper, in pearlescent orchid ink by Tsukineko. I then edged the triangle with crystal Stickles. The chicks are all from the Easter seasonal cartridge. The largest plaid chick is cut at 2 1/2," the middle polka dotted chick is cut at 1 1/2" and the smallest pink chick is cut at 1 1/4." I pop-dotted the two smaller chicks and added some pearls for eyes.

This card was made for the following challenges:

May the wind...

I have been gone for the past week. I went to Los Angeles with my sister-in-law. We went on set tours of the TV shows "NCIS" and "NCIS: Los Angeles." It was really fun and we got to mee the actors as well. Now I am back and able to craft again. :) Here is my card for today!
This is a 5"x5" square card made using shimmery green cardstock. I then cut some gold cardstock at 4 5/8"x4 5/8" and embossed it with the Polka Dots embossing folder. I wrapped it with some twine and tied it off. The white scalloped circle is from Birthday Bash, cut at 4." I then stamped the Penny Black image on the circle and colored it with Prismacolor colored pencils. I added some crystal Stickles to the image for some sparkle. The shamrocks are cut from A Child's Year. I used two different colored greens and cut them in varying sizes, 1"-1 1/2." I mounted them to the card, using pop-dots on the dark green one. I hand wrote the sentiment, which is part of an Irish blessing. I then finished off the card with some green bling and a black pearl for the eye. Enjoy!!
I am entering this card in the following challenges:

Saturday, March 12, 2011

Card Creations & More Challenge #5

Hello everyone! It is time for another So Saturday Challenge at Card Creations & More! This week's challenge is to make a tri-fold or z-fold card. I chose to feature the z-fold, and created this simple, but cute, St. Patrick's Day card.
I used a light green cardstock for the card base. I scored it where I needed it to fold, then embossed the far left portion with the Argyle embossing folder. When this card is folded it measures 5 1/2"x4 1/4." I used some shimmery dark green cardstock and layered it with some white cardstock. I wrapped it with a light green ribbon. The shamrock is cut from Paper Doll Dress Up, I used a light green glitter cardstock and I stuck it under the ribbon. The sentiment is from My Pink Stamper and I used pearlescent ivy ink by Tsukineko. I also used the same shimmery green cardstock and white cardstock for the inside of the card.
So there is my simple card for you all, but I like how it turned out! Now it is your turn to participate! Come on over to Card Creations & More and show us your tri-fold or z-fold cards. I can't wait to see what you come up with!

Saturday, March 05, 2011

Kiss Me...

Here is a super fun shaped card for you today! I used the pot of gold from Simply Charmed and welded two images on my Gypsy to get my card base. It is cut at 5." I used a shimmery gold cardstock for the base, then cut the gold pieces from yellow cardstock and the pot from black cardstock. I then used some yellow Stickles on the gold (because you HAVE to have sparkly gold) and some glossy accents on the pot. The glossy accents too FOREVER to dry since it was such a large area. :) The shamrock is cut from Paper Doll Dress Up. The larger layer is cut at 3 1/2" and the smaller one is cut at 3." I then added some faux stitching around both images and gave him a cute Peachy Keen face. I added a piece of green bling and pop-dotted the smaller layer to the larger layer. I cut the lips from Indie Art, using my Gyspy so I could hide all those cut-outs, at 3/4" from a pink cardstock. I then added some diamond Stickles to them. The sentiment, "Kiss Me," is from Sweethearts. I cut it at 1 1/2" and added some faux stitching and some bling to it as well. I tied a ribbon around my pot and then layered my pieces on. I cut out the pot of gold again, this time in a glittery yellow and the pot in green for the inside. I then stamped the, "i'm Irish," sentiment on the inside. This card is about 5"x5" with all its layers. I just love how it turned out! :)

I made this card for the following challenges:
  • Peachy Keen: "Let's Face It Friday" - use faux or real stitching
  • Paper Cutz: St. Patrick's Day
  • My Creative Time: "Throwback Thursday" - use an older cartridge and make something for St. Patrick's Day
  • Fantabulous Cricut: shaped card
  • Alphabet Challenge: R for Ribbons
  • 365 Cards: "Wednesday-Pick 5" - create a card using answers to the following:
    1)Favorite color: green
    2)Favorite design technique: Cricut
    3)Favorite embellishment: ribbon or bling
    4)Least favorite color: pink
    5)Favorite card size: 5"x5" or shaped card

Friday, March 04, 2011

Flaunt It Fridays Challenge #14

It's time for another Flaunt It Fridays challenge!! This week the challenge is to use any cut on the Twinkle Toes Lite Cartridge. If you don't have Twinkle Toes then use something with similar cuts. I don't have Twinkle Toes, so I used Shall We Dance instead.


I decided to create a layout. This is a 12"x12" layout. I used a pink and brown striped cardstock for the background of the layout. I then cut my curtains by hand and tied them with some twine. I cut some strips of cardstock for the top part of the curtain and then punched them with a Martha Stewart border punch. My little ballerinas are both cut at 3 3/4" and I used the shadow feature for both of them as well. I used some glossy accents on their eyes and cotton candy Stickles on their tutus. The "I Love Dance" sentiment is cut at 1" and the "Mini Ballerina" sentiment is cut at 1 3/4" and I used some glossy accents on it as well. There are room for two photos, one 3"x3" and one 4"x6." The mats are 1/4" larger than the previous layer.

Now it is your turn to give this challenge a try! Head on over to Flaunt It Fridays and flaunt your Twinkle Toes creations. Remember, if you don't have this cartridge feel free to use something similar. I can't wait to see what you all come up with!! :)