Monday, May 12, 2014

Firefly

It seems like I haven't been crafting, with nothing on my blog for a week now, but that is not the case.  I created a couple of Mother's Day cards, for my mom and my mother-in-law, but since they check the blog I couldn't post them.  I will soon though.  I have also been working on cutting fabric for a quilt on which I am currently working.  That has been keeping me quite busy.  At any rate, I made a card today, and here it is:


The card is 3 1/2"x5."  I used yellow card stock for the card base.  I then cut some dark brown card stock at 3 3/8"x4 7/8" to use as a mat.  The final layer is some white card stock cut at 3 1/4"x4 3/4."  I then used a stencil from Tim Holtz, called "Rays" to create my background.  I inked over the stencil with three colors of Distress Ink: Spiced Marmalade, Wild Honey, Squeezed Lemonade.


I used stamps from Peachy Keen for my image and my sentiment.  I used the lightning bug and a sentiment from the set called "A Little Light Camping."  I paper pieced the lightning bug and covered the bulb with yellow Stickles, I also covered the eyes and antennae with a shimmery brown gel pen.  The image and the sentiment are both stamped in rich cocoa ink by Tsukineko.  

I made this for the following challenges:
My Craft Spot: inking technique

Monday, May 05, 2014

Thanks, Mom!


I made a second Mother's Day card today.  It is pretty simple and made with just my Silhouette.  The card is 4 1/4"x5 1/2," and made from black card stock.  The red mat is 4 1/8"x5 3/8," and the floral mat is 4"x5 1/4."  The floral mat is actually just black and white, I colored in some parts of it with a red marker for a little pop of color.  I used my Silhouette and a font in my computer to create my sentiment, then printed it on some vellum.  I used the Silhouette and drew a rectangle around the sentiment, then cut it and adhered it over the floral paper.  I finished it off with some glittery gems in each corner.


The inside of the card is also finished.  I cut a red mat at 4 1/8"x5 3/8" and a white mat at 3 7/8"x5 1/8."  I used a stamp from My Craft Spot for the sentiment.  It is from the "Happy Easter" set.  I stamped it in Barn Door Distress Ink.

I am entering this card in the following challenges:
My Sheri Crafts: celebration of moms
My Craft Spot: Mother's Day or spring

You Rock

I made a card for Mother's Day today.  It is a fun shaped card, and pretty non-traditional for Mother's Day.


I used the set of three rocks from "Dino Play" to create my card base.  It was cut at about 3 1/2"x5 1/4."  I cut the base layer twice and scored it at about 3/4" from the top.  I then cut another base layer and inked around the edges with Weathered Wood Distress Ink.  The other two layers were also inked with the Weathered Wood Distress Ink, but those layers were adhered with foam tape for some dimension.  The sentiment was created from three different stamps.  "Mom" is from Scrappy Moms Stamps' "All in the Family" set.  "You" is from My Pink Stamper.  "Rock" is from the "Picture Perfect" set by Scrappy Moms Stamps.  The entire sentiment is actually "rockin' the park" and I masked off everything except, the word rock.

I am entering this card in the following challenge:
BBTB2: Mother's Day

Thursday, May 01, 2014

Tea-riffic!


This card is 5 1/2"x4 1/4" and made from white card stock, with the fold at the top.  I cut a light blue mat at 5 3/8"x4 1/8" and a floral mat at 5 1/4"x4."  The blue strip is 3/4"x4."  I added two pink gems at either side and stamped my sentiment.  The sentiment is from Scrappy Moms Stamps, the "Freshly Brewed" set.


The blue scalloped circle and the white circle are both cut from Spellbinders dies.  The blue scalloped circle is from the Lacy Circles Nestabilities set and the white circle is from the Classic Circles Large Nestabilities set.  I adhered them to the card with foam tape.


The teapot and teacup images are from the "January 2014 Stamp of the Month" kit from Peachy Keen.  I paper pieced the teapot and the cup.  I colored in the tea, then covered it in glossy accents, I also covered the teapot's eyes in glossy accents.  The teacup is adhered to the card with foam tape.


For the inside of the card I cut another blue mat at 5 3/8"x4 1/8" and another floral mat at 5 1/4"x4."  I then cut a blue mat at 4 1/4"x3" and a white mat at 4 1/8"x2 7/8."  The sentiment is from the "January 2014 Stamp of the Month" kit, as is the stack of teacups image.  I paper pieced the teacups.

I made this for the current sketch challenge at Peachy Keen Stamps.

Wednesday, April 30, 2014

Whip Up Some Fun!


This card is 5 1/2"x4 1/4" and the fold is at the top.  I used a pale yellow card stock for the card base.  I then cut a white mat at 5 1/4"x4" and rounded its corners with a 1/4" corner rounder.


The mixer image is a Peachy Keen stamp, from the September 2013 Stamp of the Month kit.  I colored it in with some markers I had on hand and then stamped my sentiment.  The sentiment is from Scrappy Moms Stamps, the "A Pinch & a Dash" set.

I made this for the following challenges:

Color Throwdown: color challenge

CASology: cue word - "electric"

Monday, April 28, 2014

Welcome Baby

Today's card is a fun baby card, with a twist!


The card is a 5"x5" twisted easel card.  I used black card stock to construct the card base.  I cut blue mats at 4 7/8"x4 7/8," and polka dot mats at 4 3/4"x4 3/4."  I used the "ZooBalloo" Cricut cartridge to cut the waves.  These are found on page 131 of the handbook.  The smallest set of waves was cut at 3/4" and two sets were welded together, then trimmed to fit the card.  The second set was cut at 5" wide, to fit the card.  That made them just over 1" tall.  The third set was cut at 1 1/2" and the final set was cut at 2."  All the waves were inked around the edges with Salty Ocean Distress Ink.  I adhered the first three sets of waves together, then used foam tape to pop them up in the middle, while adhering the edges to the card.  The final layer was adhered to the card.  


The whale was cut from the "Tiny Treasures" Cricut cartridge.  It is on page 38 of the handbook.  The whale was cut at 3."  I added some waterfall Stickles to the spurt of water and black enamel to his eye.  I finished off the front of the card with some cloudy blue gems in the top corners.


The blue and polka dot mats are the same for the inside as the outside.  I then cut another piece of blue card stock at 4"x4" and some white card stock at 3 7/8"x3 7/8."  I used a stamp from the "Big Sentiments 2" stamp set by My Craft Spot for the sentiment.  I then finished off the card with my "stopper," which is a large cloudy blue gem.


I made this for the following challenges:

My Craft Spot: black, white, & one other color

The Friday Mashup: fun fold project with some polka dots 

Wednesday, April 23, 2014

Bee-day

I have a cute and simple card for you today.


I used a pre-made 5 1/2"x4 1/4" glittery yellow card base from DCWV for this one.  I cut a black mat at 5 3/8"x4 1/8" and then a white mat at 5 1/4"x4."  I stamped the bee image on the white mat, then colored it in.  The stamp is from Peachy Keen, the "April 2013 Stamp of the Month Kit."  I added some star dust Stickles to the wings for a little more shimmer.  The sentiment is from Scrappy Moms Stamps, the "Little Critters" set.

I made this for the challenge at CASology, this week's cue word is "garden."

Monday, April 21, 2014

Birthday Birdie

Here is a card I made today:


The card is 6 1/4"x4 1/2," and is made from white card stock.  The black mat is 6 1/8"x4 3/8" and the ombre green paper is 6"x4 1/4."  Both pieces of patterned paper are from the Spring and Summer Stack by DCWV.  


The Polaroid image is from the Silhouette Store.  It is called "Polaroid Photo Frame" by Snapdragon Snippets (#18096).  It was cut at 3 5/8"x3."  I then cut a black mat for it at 3 3/4"x3 1/8."  I also cut a piece of palm fronds patterned paper to fit behind the open part of the frame.  I used a stamp from the "Big Sentiments 2" stamp set from My Craft Spot for my sentiment.


The bird is from the "3 Birds on Parade" cartridge.  It is the first image in the handbook (page 28).  I cut it at 2 1/4," not cutting the face or beak.  I then stamped a face on my bird using the Critter Faces Set from Peachy Keen Stamps.  I also flocked the wings and stomach, which I hand cut, to give my bird a little texture.


The final piece of my card was the flower.  It was also cut from the Silhouette.  It is called, "Set of 4 Layered Flowers" and by PPbN Designs (#56023).  I cut only one of the flowers, and then only the three smallest layers and the center dot.  The largest of the layers was 1.415"x1.54."  I pieced them together, leaving the petals loose and curling them slightly.  I added some glitter to the center of my flower, then attached it to the top corner of the image.

I made this for the following challenges:
BBTB2: birds
My Craft Spot: shake on something (glitter, flocking)
The Friday Mashup: sketch with an ombre background (I cheated a little and used an ombre paper)
Peachy Keen: photo/color inspiration (birds, blue and orange colors)

Thursday, April 17, 2014

Boot-shaped Card

My dad's wife's birthday is coming up, in fact coming up so soon that I hope this gets to her in time, and I made this cowboy boot shaped card for her.


The card is cut from the Silhouette Cameo.  It is a cut file from Lori Whitlock called "A2 Lori Whitlock Boot Shaped Card" (#43737).  It was cut without making any alterations in size, so approximately 5 1/2"x4."  The patterned card stock that makes up the boot and boot strap are from the Rustic Stack by DCWV.  The patterned card stock used for the boot sole is from the Textures & Finishes Stack by DCWV.  I cut the boot strap twice, adhering the first one to the boot and adhering the second one with foam tape for a little dimension.  I added a dark gold brad through the hole of the boot strap.  I also inked the edge of the boot with tea dye Distress Ink, by Tim Holtz.


The medallion the sentiment is stamped on is a metal die from My Craft Spot.  Both the circle and the two scalloped circles are from the Tiny Doilies Metal Dies set.  The sentiment itself is from Scrappy Moms Stamps, the "Dancing in Circles" set.  I stamped it in royal silk ink by ColorBox.  I then added a brownish-gold gem to the center of the sentiment.  I finished off the card with some gold shimmer baker's twine, from the Twinery, tied off in a bow and adhered at the top of the medallion and bottom of the boot strap.


I made this for the following challenges:

Die Cuttin' Divas: "Tic-Tac-Toe" - shaped card, 3 patterned papers, twine


Monday, April 14, 2014

Recipe Album

Today's project is a little recipe album.


The album is made of chipboard cut into 4"x6" pieces.  I then covered each piece, both front and back, with patterned card stock from the Honey Chic Stack by DCWV.  I punched holes in the top of pages and attached them all together with rings.


The word "recipes" is stamped on banners and "hung" on some twine.  The banners are die cuts from My Craft Spot, they are the "Tiny Tags Metal Dies" set.  The letters are from the "Chunky Alphabet" set, also from My Craft Spot.  The twine is pink sorbet from The Twinery.  I adhered the banners with foam tape and tied two bows from the twine to put at the corners.  The gems are from DCWV and are little heart shapes.


The tabbed index cards are from the "From My Kitchen" Cricut cartridge.  They were cut at 1."  The little black images, as well as the white ones on the bottom, are also from the same cartridge.  Both are using the tabs feature, the small icons are the shift function of the tab feature.  The black icons were cut about 1/4" tall (maybe slightly smaller) and the white ones at the bottom were cut at about 1/2" tall.  I don't remember their exact sizes, I used Cricut Craft Room to size them appropriately to the album.

I made this for the current challenge at My Craft Spot, which is to use tags and/or banners.

Thursday, April 10, 2014

Ferns & Woodgrain

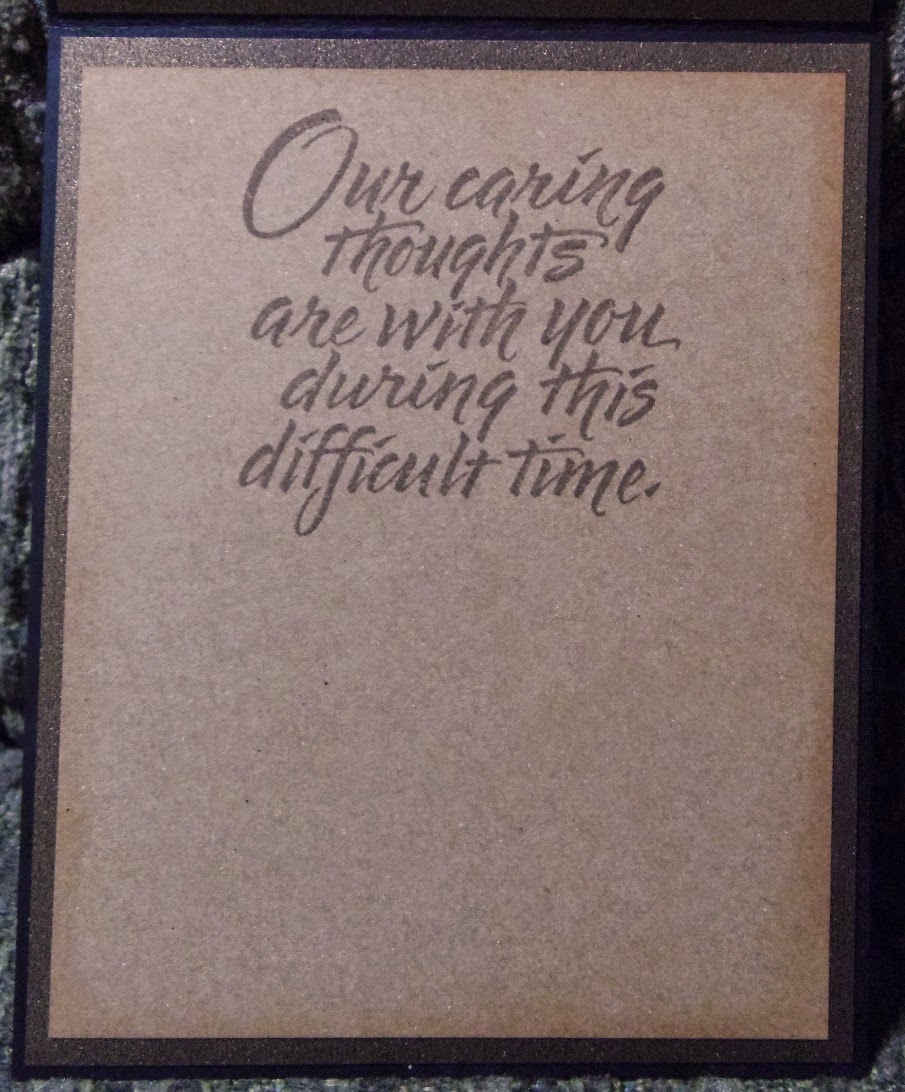
My husband requested that I make a card for him to bring to give to one of his co-workers, signed by everyone in his office.  His co-worker is having a difficult time currently as his mother is very ill, with a couple of different types of cancer.  This is what I came up with, using the sentiments that my husband chose (the photos don't really do it justice though):


The card is 5 1/4"x4 1/4."  I used a shimmery brown card stock for the base.  I then stamped a wood grain background stamp on another piece of the shimmery brown.  I stamped it with embossing ink and heat embossed it with some gold embossing powder.  I trimmed this piece to 3 7/8"x4 7/8" and adhered it to the card base with foam tape.


The fern fronds are from the Silhouette store.  They are by Jennifer Wambach (#20213).  I cut the two paler green ones at 3" and 2 1/2" (approximately) and the darker green one at 2" (approximately).  The sentiment is from Scrappy Moms Stamps and is stamped in cocoa brown ink by Tsuikneko.  I then trimmed the card stock into a banner and inked its edges with Tea Dye Distress Ink by Tim Holtz.  I added a couple of gold brads to the sides and adhered it to the card, over the base of the ferns, using foam tape.


I also finished the inside so that my husband and his co-workers would be able to all sign the card.  I cut two pieces of the shimmery brown card stock at 5 1/8"x4 1/8."  I then cut two pieces of kraft card stock at 4 7/8"x3 7/8."  I inked the edges of the kraft mats with Tea Dye Distress Ink.  The sentiment is a wooden stamp I had in my stash and is stamped with more of the cocoa brown ink.