Showing posts with label Tie the Knot. Show all posts

Tuesday, July 05, 2016

Wedding Cards

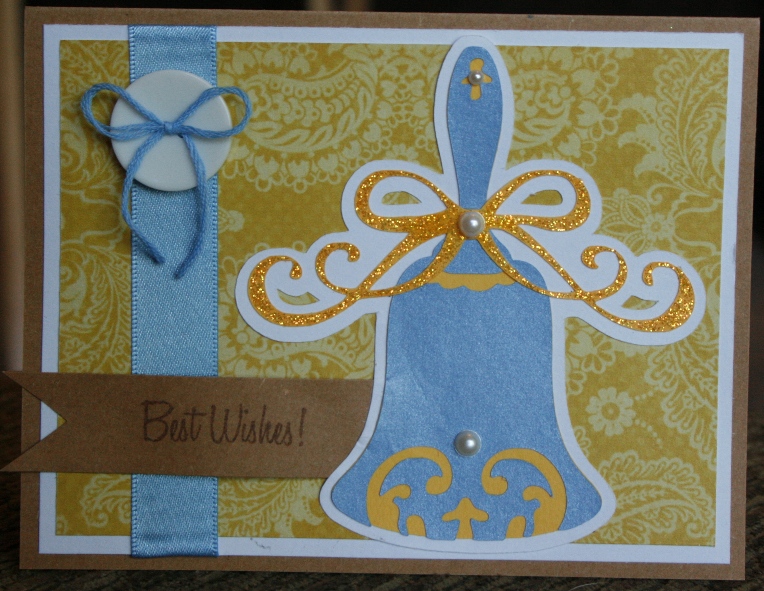
My brother got married yesterday, so I thought I would post the two wedding cards I made for him and his new bride.  The first is the one my husband and I gave him with their gift, the other I made for my mother to give to them.


The card is 5 1/2"x 4 1/4."  I used the image from the Otter Handled Bag from SVG Cutting Files for the background and the otters.  I inked around the edges of everything with various Distress Inks.  I also used the writing feature in Cricut Design Space to write within the heart.  It says "you were made for each otter!"  One of the hashtags they use is #loveotters, so this little image was perfect.  I finished off the card with some white gel pen detail, glossy accents on the noses and eyes, and some blue sequins.


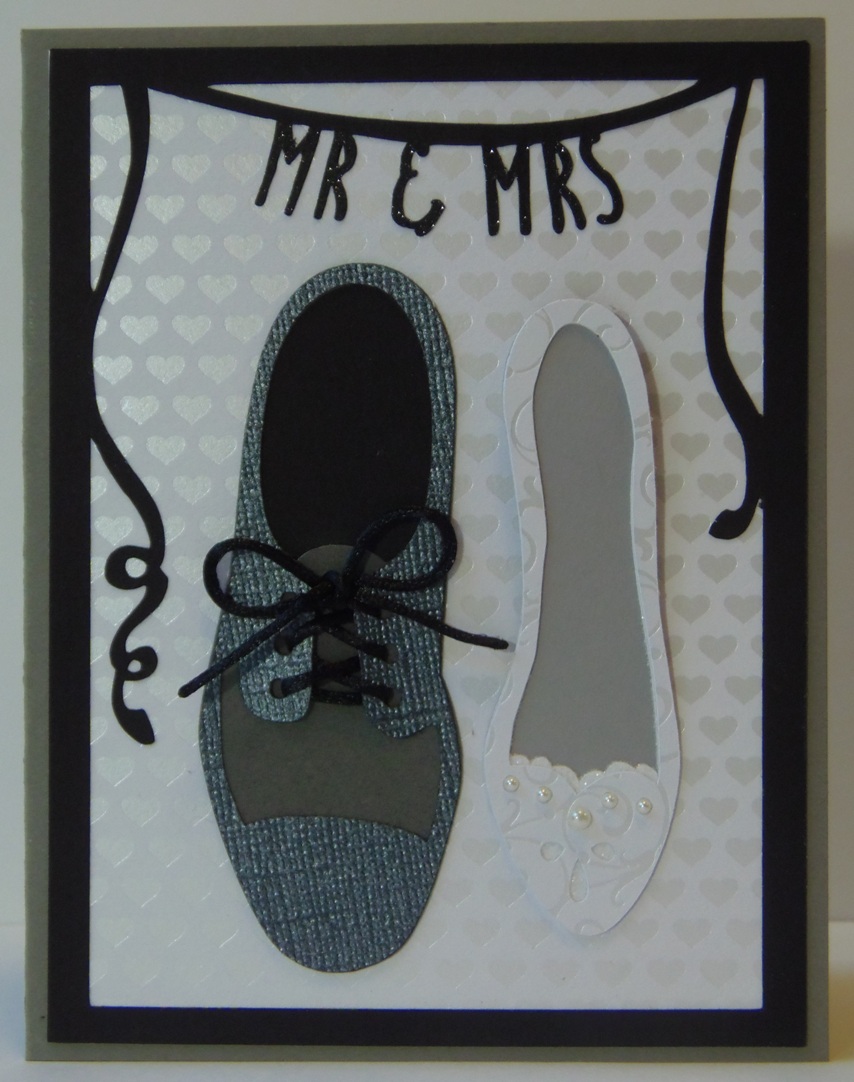
This second card is the one my mother gave them.  My new sister-in-law loves shoes, so that is why I went with the shoe theme.  I used the Cricut "Photo Fun - Celebrations" digital cartridge for the Mr & Mrs frame.  Both shoes are from the "Tie the Knot" cartridge.  I tied some beading cord through the man's shoe for a little realism.  I added pearls to the woman's shoe and popped up the heel to make it seem like it was a high heel.

Saturday, September 08, 2012

True Love

This is a pretty simple layout, but I still really like it. I really love the hibiscus border I created with this one. I used Tie the Knot for the hibiscus. They are all cut at 2." The ones on the right hand page were cut using the flip feature. I also used Word Collage to cut the title. I cut it using Cricut Craft Room so that I could hide every other part of the collage except the "true love" part. The whole collage was about 11" tall to get the letters that size. They are about 1 1/4" tall.

Monday, June 18, 2012

Blue Bell

This card is 4 1/4"x5 1/2." I used kraft cardstock for the base and cut the layers 1/4" smaller than the previous layer. The patterned yellow cardstock is from the Lemon Flower Stack by DCWV. I wrapped the white and patterned yellow layer with blue ribbon and then adhered it to the card base. I added a white button, which was tied with blue embroidery floss. I used Tie the Knot for the bell, which is cut at 3 3/4." I cut a strip of kraft cardstock and snipped the end of it to create a banner. I stamped it using coffee bean ink by Tsukineko and a stamp from Scrappy Moms Stamps. I adhered the bell on top of the end of the banner. I also popped up the middle of the banner for some added dimension. I finished off the bell with some yellow Stickles on the bow and three white pearls.
I made this for the following challenges:

Wednesday, February 29, 2012

Sweet Birthday Wishes

This sweet cupcake card is 4 1/2"x6 1/4." I created the aqua/purple mat by spraying white cardstock with some Tatter Angel Glimmer Mist. I sprayed it with turquoise blue, then spattered it with a little bit of purple. The cupcake is cut at 4 3/4" from Sweet Shop. I used glossy accents on the cherry and also pop-dotted it for some dimension. I embossed the icing layer with the D'vine Swirls embossing folder. The monogram is from Tie the Knot, cut at 1 3/4." I blinged up cupcake with some gems on the wrapper, cinnamon Stickles on the sprinkles, and grape Stickles on the "L" part of the monogram. The sentiment is from Scrappy Moms Stamps. I adhered the cupcake to the card with pop-dots. I created this card for the following challenges:

Thursday, September 01, 2011

First of the Month Challenge #21

Our third challenge for this month is to create a double layout. I created another double layout for my friends' wedding album. The background cardstock is from the Formal Affair Stack by DCWV. The four photos on the left are all 3 1/2"x3 1/2." The two smaller ones on the right are 4"x4" and the large one is 4 1/2"x6." I matted them all with some coral colored cardstock and then matted the largest one with some aqua glitter cardstock. I used the same glitter cardstock for the title. "The Bride" is from Sweethearts and "gets ready" is from All Mixed Up. I used Sweethearts, Tie the Knot and Formal Occasion for the three dresses. All three are cut at 3." I used pop-dots to adhere the top and bottom ones. I used three Nestabilities for the journalling label and finished it off with some white pearls.
Now it is your turn to create a double layout! Link it up at the First of the Month Challenge so I can see what you do with this challenge!

Saturday, June 11, 2011

Wedding Cake

This is a wedding cake shaped card inspired by the word "frosting." That is the challenge for Day 103 at 365 Cards...to be inspired by the word frosting and create a card using that inspiration. I used my Gypsy to weld two of the cakes from Tie the Knot. They are 4 1/2" and I used the shadow feature. I cut a blackout version from black cardstock, then cut all the layers in white. I added some Martha Stewart sugar cube glitter onto the cake stand. I also embossed the cake layers with D'vine Swirls, then drew over the swirls with white opal Liquid Pearls. That's all there is to it! Enjoy!!

Thursday, March 17, 2011

Mother's Day Card

HAPPY ST. PATRICK'S DAY!!

This is a 5"x5" card made with purple cardstock. I cut a piece of green polka dotted paper 1/4" smaller and mounted it on the card base. I then cut three strips of the green/purple patterned cardstock 4 3/4" long and one of them at 2" wide and the other two at 1 1/8." I mounted them to the green paper with 1/4" between the top and bottom and each other. I cut two sqares at 1 1/8" and then cut them in half to form four triangles. I then used the Swiss Dots Cuttlebug folder to emboss them. I inked them lightly with spring pansy ink by Tsukineko and adhered them to the corners. I cut a piece of purple cardstock at 3 1/4" square and also embossed it with Swiss Dots and inked it. I adhered it in the middle of the card. I cut some cream cardstock at 3" square and inked the edges of it with peach pastel ink by ColorBox. I then used the "Mom Words" stampe by Stampendous on it, using pearlescent beige ink by Tsukineko. I covered it with some vellum and stamped the "Happy Mother's Day" sentiment, which is by My Pink Stamper, in purple hydrangea ink by Tsukineko on top of the vellum. I cut the orchid from Tie the Knot at 1 1/2." I used the blackout feature for the dark green and dark purple, then the regular feature for the lighter green and lighter purple. I used two different sized pop-dots to adhere the flower and leaves to the card.
I made this card for the following challenges:
  • Paper Playtime: Challenge #1 - green & purple
  • My Creative Time: Throwback Thursday - older cartridge & use green
  • Jitterbuggin': sketch & use green
  • Die Cuttin' Divas: "Unused & Unloved" - use a never used or rarely used cartridge and a cut you have never used (I rarely use Tie the Knot and have never used the orchid cut before)
  • Crafty Creations: Mother's Day
  • 365 Cards: Ad Inspired (I loved the greens, the clean lines and the plant in the background)


Wednesday, January 19, 2011

Feeling Lucky

I thought this turned out to be a pretty fun card. I wasn't sure of it at first, but I kept going and I like the end result. The card is 4 1/2"x6 1/4" and made of black cardstock. I trimmed some shimmery white cardstock at 4 1/4"x6" and then embossed it with the Polka Dots embossing folder. I cut a strip of pink cardstock at 2 1/2"x6 1/4" and used an EK Success border punch on each side. I then added some black gems on every other scallop. I wrapped some ribbon around the strip and then adhered it to the card. I cut the corset from Tie the Knot at 3 1/2." I used some black pearls for the buttons on it and then added some diamon Stickles to the edges for some shimmer. I adhered it to the middle of the card with some pop-dots. I used Blackletter for the "feeling," cut at 1," and used my Gypsy to weld the letters together. "Lucky" is cut from Indie ar at 1." I used some black glitter on both parts of the sentiment. I left the inside blank because I still don't quite know what to put on the inside...I'm hoping I can come up with something good, but until then, it stays blank. :)
I made this card for the following challenges: