Sunday, November 30, 2014

Cowboy Penguin

Over the weekend I got a Cricut Explore and this is the first thing I have made using it.

 A cute shaped card for a birthday.


The card base is made from the map image on "Life's a Party," found on page 44 of the handbook.  I hid the cuts that make the trail and cut it twice, at 5," to create the card base.  I also used the pens to draw the word "wanted" on the scroll.  I used the "Old West" cartridge and the flourish feature for the font.  I then colored in the letters afterwards.


The penguin and cowboy hat are stamps from Peachy Keen Stamps.  The penguin and cowboy hat are from the new Faceless Cowboy Hat Snowman & Penguins.  I paper pieced the bandanna and hat band.  I then used some Distress Markers by Tim Holtz to color in the feet (spiced marmalade) and hat (vintage photo).  The face is from Happy Penguin Couples Face Assortment.  I used more Distress Markers on the eyes (tumbled glass) and beak (spiced marmalade).  I then used a white gel pen to accent the eyes.  I added some pale gold gems to the hat band.  I adhered the penguin with foam tape.


I used the Peachy Keen Holiday Sentiments set for the sentiment on the inside of the card.

I made this for the current challenge at Die Cuttin' Divas, which is shaped cards.


Friday, November 28, 2014

It's Sweater Weather

I have another gift card box for you today!


This one is meant to look like a sweater tucked into a box.  I cut it with my Silhouette Cameo, using a cut file by Kristen Magee called "Argyle Sweater Gift Card Box" (#35378).  I did not alter the size in any way, just cut it as is.


I wanted the packaging to be simple, kind of old school.  I wrapped the top of the box with red and white baker's twine and then tied two pieces in a bow to finish off the box.


I made the argyle sweater look like a Christmas sweater.  I used paper I had in my stash and covered the dark red diamond and the collar of the sweater with dark red flocking powder.  


You lift the sweater up to reveal the gift card.


Friday, November 21, 2014

Snowman Hugs...

I made a little treat box today.


This one is shaped like a coffee mug.  I used a cut file from My Scrap Chick called Full Cup Treat Holders.  I used the "scooped top" mug and cut it so that, when assembled, it is about 4" tall.


The snowman is from the "Snow Friends" Cricut cartridge.  I cut it at 4."  I did hide the face using Cricut Craft Room so that I could use a Peachy Keen stamp for the face.  It comes from the Happy Lashes Face Assortment.  I used some markers to color in the nose and mouth.  I added a couple of navy blue buttons for a little embellishment.  I also added some glossy accents to the snowman's boots.  The snowman is mounted on the mug with foam tape.


The sentiment and the banner  on which it is stamped are from My Craft Spot.  The sentiment is from the Think Snow set and the banner is one of the metal dies, Ribbon Banners - Arched.  I adhered it on some toothpicks to mount it at the top of the mug.

I made this for the following challenges:
Color Throwdown: color challenge

BBTB2: anything goes

Wednesday, November 19, 2014

Penguin Gift Box

Part of the Christmas present for my father and his wife is a gift card to one of their favorite restaurants.  Today I made a box in which to put that gift card.


The box is from a set called Winter Paver Favor Boxes & Cards by My Scrap Chick.  I used my Silhouette Cameo to cut it out.  Once it is all assembled it stands about 5 1/4" tall, by 3 3/4" wide, and 1 3/4" thick.  I did alter its size a little, so that at its widest point the box perfectly fits a gift card.


Before putting the white part of the penguin on the top of the box I wrapped it with some red and white twine.  I also made sure the run the twine through the hole of my tag.  The tag is from the "Mickey and Friends" Cricut cartridge.  It can be found on page 116 of the handbook, the icon feature.  I cut it at 1 1/4."  I cut the white layer twice, once for the front and once for the back.  I used stamps from My Craft Spot for the sentiments.  Both of them are from the Tiny Tags Christmas set.


I embellished the penguin with some little buttons that I made using the "Cricut Essentials" cartridge.  They can be found on page 42 of the handbook, using the shift function.  I cut each one three times, at 1/2," to make them nice and thick.  I inked around the edge of everything (buttons, beak, feet, bow tie) with tea dye Distress Ink by Tim Holtz.


I decided not to use the eyes that come with the box.  Instead I stamped some eyes using Peachy Keen stamps.  The eyes are from the Erkle & Merkle Face Assortment.

I made this for the following challenges:
Cardz TV: 3D Challenge - create a gift card holder
My Craft Spot: 3D Christmas
Fantabulous Cricut: use three embellishments (buttons)
Tuesday Throwdown: Christmas tags

Thursday, November 06, 2014

Anniversary Gift Box

My husband's and my anniversary is coming up this month.  Actually it is on Thanksgiving this year.  And it is our 10 year anniversary.  If that isn't enough, since I work retail I will be working all weekend for Black Friday and Saturday, so we really can't even do much to celebrate.  But, I know we will have a nice dinner and spend some quality time together, so it all works out in the end.

I made a gift box for part of his present and here it is:


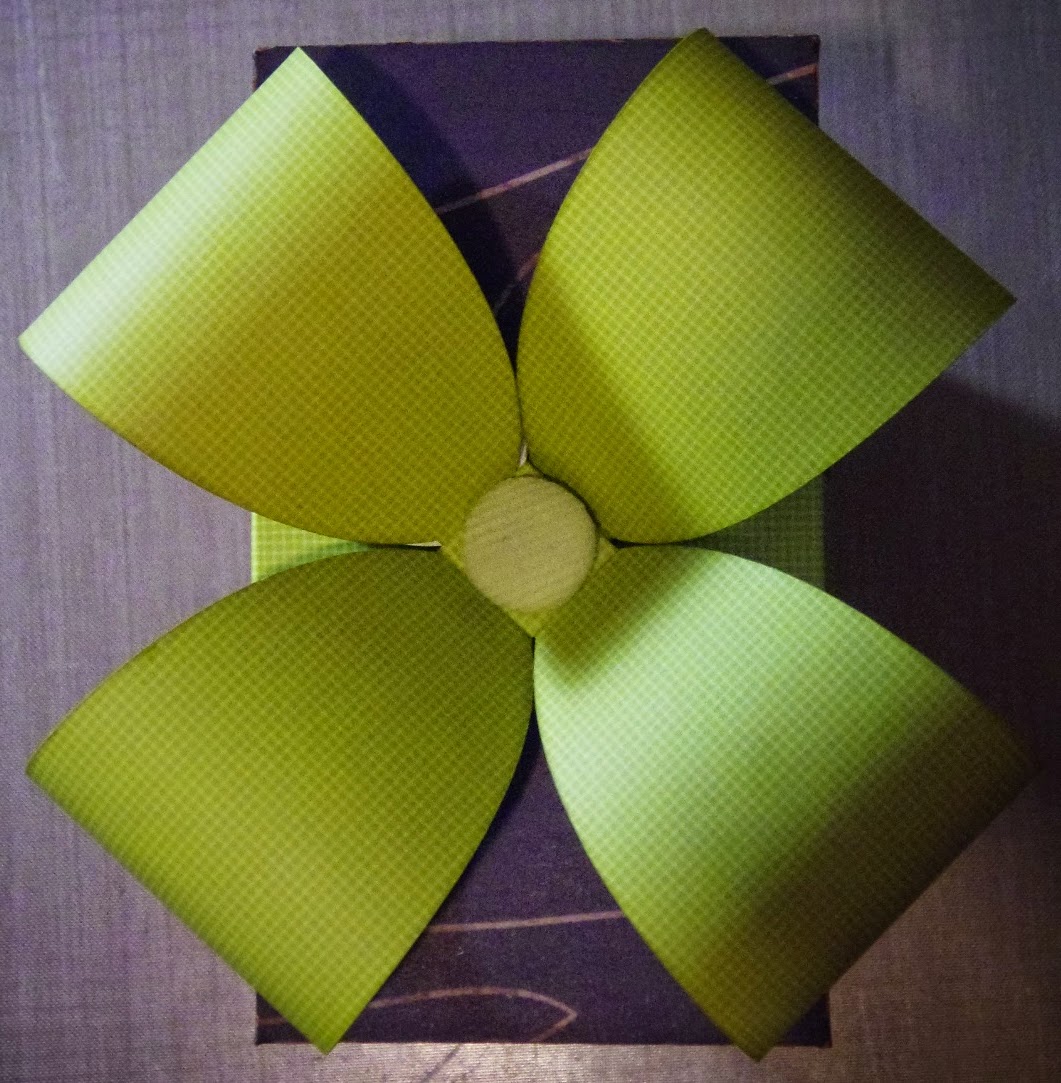
I used one of the new svgs from My Craft Spot for everything: the box, bow, and tag.  The cut file for the entire thing is called Present Box.  I cut it with the Silhouette, sizing it so the base of the box was the size of the mat, so slightly larger than its default size.


Once the bow was all assembled I put a fabric covered brad through the middle of it.


The dark green tag is 3" tall and the light green one is 2 3/4."  I used stamps from My Craft Spot for the sentiments on the tag.  Both "happy anniversary" and "I love you" are from the Always & Forever stamp set, as is the heart.  I added a brown button brad through the hole in the tag and also a moose brad in the empty space between the sentiments.

I am entering this in the current challenge at My Craft Spot, which is to use metal (brads) on your project.

Wednesday, November 05, 2014

Waving Hello

Here is a quick and simple card for you today.


The card is 5 1/2"x4 1/4," and made from dark purple card stock.  The blue mat was cut with a rectangle from "George and Basic Shapes."  I used Cricut Craft Room to size it at 5 3/8"x4 1/8," this required turning off the aspect ratio.  I used the rectangle found on page 116 of the handbook.

The waves are from the "Going Places" cartridge.  They were cut at a length of 5 3/8," and I cut three of them.  They are on page 113 of the handbook, I hid the sailboat since I only wanted the waves.


The sailboat and sentiment are both Paper Smooches stamps.  They are both from the Wicked Nauticool stamp set.  I stamped the sailboat on white card stock, fussy cut it out, then colored in the mast and body of the boat with the vintage photo Distress Marker by Tim Holtz.  I adhered it so that it was slightly under the second layer of waves.  The sentiment is not actually one long one, but stacked with waving above hello.  I masked it off to create the long one since it worked better with the layout of my card.  It is stamped in black Versafine ink by Tsukineko.

And now the inside:


I cut more of the blue card stock at the same size, 5 3/8"x4 1/8," this time I did it with my straight trimmer though.  I then cut a white piece of card stock at 5 1/8"x3 7/8."  I used more Paper Smooches stamps for the inside as well.  The sentiment is from the Word Up set.  I then added a heart and some waves, both from the Wicked Nauticool set again.  The heart was stamped in purple hydrangea ink by Tsukineko and the sentiment and waves were stamped in the black Versafine ink again.  I then added a little bit of blue to the waves with the tumbled glass Distress Marker by Tim Holtz.

I made this for the following challenges:
Color Throwdown: color combination

CASology: cue card - sea

Paper Smooches Sparks: anything goes

Fantabulous Cricut: anything goes