Wednesday, October 30, 2013

Create a Critter 2 - Creation #8

This "Create a Critter 2" creation is truly clean and simple!


The card is 5 1/2"x4 1/4."  I used black card stock for the base.  I then cut a piece of 3M sticker paper at 5 3/8"x4 1/8" and another piece of black card stock at 5 1/4"x4."  I embossed the black piece with an embossing folder by The Paper Studio called "Quatrefoil."  The sentiment is from "Create a Critter 2."  It is the phrase feature and is found on page 77.  I cut it, using the cut to length feature, at 3 1/2."  I used more sticker paper from 3M for the sentiment.  I finished the card off with some bright pink pearls at the bottom corner.

I made this to fit the current challenge at CASology.  Their cue word is "black."

Create a Critter 2 - Creation #7

I made another Christmas card using the "Create a Critter 2" cartridge today.  This time I made a shaped easel card with my cut.


The cut I used was the Christmas present found on page 71, it is the icon feature.  I cut it at 5," and also used the shadow feature for it.  I then cut a card base to fit behind the present and folded it to make an easel card.

I used a metal die from My Craft Spot to create my scalloped circle tag.  I cut all the layers with the variety of dies on the "Tiny Doilies Metal Dies" set.  I also used a My Craft Spot stamp for the "no peeking" sentiment, stamped in merlot ink by ColorBox..  It is from the "Stampin' Around Christmas" set.  I added a stocking charm to the middle of the tag with some blossom twine from The Twinery.  I adhered the tag with a glue dot at the top and pop-dots at the bottom for some interesting dimension.

I cut some mats using the same colors I used on the present.  I added a final white mat where I put my sentiment.  The sentiment is from the "Mistletoe" stamp set, also by My Craft Spot.  The presents to either side are from the "Stampin' Around Christmas" set.  The sentiment was stamped in merlot ink and the presents in olive ink, both by ColorBox.  I finished off the card with a green gem above the sentiment as my stopper for the present, when it is standing open.


I made this for the following challenges:
365 Cards: "Day 301" - add elements that begin with "c" (Christmas present, charm, circles)
Color Throwdown: old olive, close to cocoa, blushing bride, cherry cobbler
Christmas Card Challenges: bows (bow on present, bow from twine)
52 {Christmas} Card Throwdown: fancy fold cards
Die Cuttin' Divas: anything goes

Tuesday, October 29, 2013

Create a Critter 2 - Creation #6

For today's project using "Create a Critter 2" I made a tag for some Halloween treats that I brought to work.


The skeleton bear is on page 58 of the "Create a Critter 2" handbook.  I cut 25 of them at 2 1/2."  I also cut the shadow.  I hid the face in Cricut Craft Room so that I could give him a Peachy Keen face.  The face is from the "Cute & Cuddly Assortment."  I stamped a sentiment from Scrappy Moms Stamps, the "Bewitched" set, on the back of the tag.  I punched a hole in the ear and ran black and orange twine through it to create a way of tying my tag to the treats.


My treats are skeleton brownies.  I baked some brownies and cut them into squares.  I stuck a toothpick through some yogurt covered pretzels, then poked it into the brownies.  I drew a face on some marshmallows with a toothpick and some black gel food coloring.  I then stuck the marshmallow on the top of the toothpick.  I wrapped up the goodies and tied it off with the tags.

Sunday, October 27, 2013

Silhouette Sunday - Cauldron Card

For today's Silhouette Sunday I decided to make one more Halloween card.


The card is 5"x7."  I used a purple card stock for the base, then cut some mats for it.  The black one is 4 3/4"x6 3/4," the green one is 4 5/8"x6 5/8," and the black plaid one is 4 1/2"x6 1/2."  I cut a strip of green card stock at 4 5/8"x1 5/8" and used the Martha Stewart drippy goo border punch on its bottom edge.  I stamped my sentiment on the green border.  The sentiment is from Scrappy Moms Stamps, the "Bewitched" set.  I then added a few purple pearls to the corners of the green banner.

My cuts all came from the Silhouette Studio.  The "cauldron with witch's feet" is by Sarah Bailey (#49153) and the "halloween kitty" is by Michelle Renee (#50184).  The cauldron/feet is about 5" tall when all assembled.  The cat is about 3 1/2."  I added some Stickles to parts of my cuts: yellow to the buckles, black diamond to the spider and star dust to the little white dots on the cat's eyes.  I also covered the cauldron and cat's eyes with glossy accents.

I also finished the inside of this card as well.  The black mat is 4 3/4"6 3/4" and the green plaid mat is 4 1/2"x6 1/2."  I then cut another black mat at 3 1/2"x5 1/2" and a white mat at 3 3/8"x5 3/8."  The ghost is from the Silhouette Studio and is about 4 1/2" tall.  It is called "classic ghost" and is by Sarah Bailey (#49622).  I then stamped a sentiment inside the ghost.  The sentiment is from the "Ghostly Greetings" set by My Craft Spot.  I also added a sentiment at the bottom of the white mat, from the "Bewitched" set by Scrappy Moms Stamps.

I am entering this card in the following challenges:
Scrappy Moms Stamps: Halloween craft
{PIN}spirational Challenges: picture inspiration (Halloween)
Die Cuttin' Divas: Halloween

Thursday, October 24, 2013

Create a Critter 2 - Creation #5

I have a Christmas card for you today using the "Create a Critter 2" Cricut cartridge.

I made a few different variations of this one using different patterned papers, a flip in the layout of the card, and two different faces on the snowmen, otherwise they are the same.


The cards are 5 1/2"x4 1/4" and white card stock was used for the card base.  I then cut some shimmery blue paper at 5 3/8"x4 1/8."  The white strip across the middle is 3 1/8"x5 3/8" and the patterned paper strip is 3"x5 3/8."  All the patterned paper came from The Holiday Collection Christmas Stack by DCWV.


I used the "Elegant Edges" cartridge to cut the shape the snowman is sitting on.  It is called "snowflake" and is on page 47.  I used the oblong and shadow features to create my blue and white layers.  The snowman is from "Create a Critter 2."  It is the icon feature and found on page 68.  I used Cricut Craft Room to hide the face.  It was cut at 2 1/2."  I used the Winter Wonderland Face Assortment by Peachy Keen to give the snowmen some adorable faces, which I colored in with some markers.

The sentiment is from two different stamps by My Craft Spot.  The "we wish you a" is from "'Tis the Season" and "Merry Christmas" is from "Jingle All the Way."  I stamped them on white banners and adhered them behind the shape on which the snowman is sitting.


Sunday, October 20, 2013

Silhouette Sunday - Teddy Bear Onesies

Sorry that today's Silhouette Sunday is coming so late, but I guess I just forgot that it was Sunday.  Not to mention that work was really busy the past few days, which put me in no mood to craft when I got home.  However, without further ado, here is what I have created for today's Silhouette Sunday:

Adorable teddy bear onesies!

I bought the onesies as JoAnn Fabrics and used some iron-on vinyl to create my little rainbow of bears.


The bear is a cut file called "cute pink baby girl teddy bear" and is by PPbN Designs (#40661).  Even though it is called pink teddy bear it doesn't matter since this is not a print and cut design.  I was able to cut them all out of various colors of the vinyl.  When the bear is all assembled it is about 3 7/8" tall.

Create a Critter 2 - Creation #4

It has been a while since I have posted anything.  I have been quite busy with work and just keeping up with stuff around the house.  Sometimes life just gets in the way of crafting, unfortunately.  I do have a cute little thank you card for today using the "Create a Critter 2" cartridge.


The card is 5 1/2"x4 1/4."  I used dark brown card stock for the base.  The shimmery orange mat is 5 3/8"x4 1/8," and the white mat is 5 1/8"x3 7/8."

The tree and pumpkin were cut from the "Create a Critter 2" cartridge.  The tree is the icon feature found on page 63.  I cut it at 3" and didn't use the face.  The pumpkin is found on page 62 and is the accessory feature.  I cut it at 1 1/2."  I used a Peachy Keen face stamp on the pumpkin.  The stamp is from the October 2013 Stamp of the Month kit.  The pumpkin is adhered with some foam tape.


The little acorn is also from Peachy Keen.  It comes from the October 2012 Stamp of the Month kit.  I stamped it twice, once on the kraft card stock and once on the dark brown.  I then paper pieced it together and adhered it with foam tape. The sentiment is from the Peachy Keen October 2013 Stamp of the Month kit as well.  I stamped it on white card stock and matted it with the shimmery orange.  I added some orange gems to the sentiment's banner.

I made this card for the following challenges:
Perfect Sentiments Challenge: clean and simple thank you
The Friday Mashup: tree or leaves and the color orange
Stuck On U Sketches: anything fall themed
Peachy Keen: sketch

Sunday, October 13, 2013

Silhouette Sunday - Santa

On today's "Silhouette Sunday," I made my first Christmas card with the Silhouette Cameo.

The card is 5 1/2"x4 1/4."  I used white card stock for the base, then cut some holly printed paper at 5 3/8"x4 1/8."  The holly paper is a piece of open stock paper that I picked up at JoAnn's a while back and I don't know who makes it.  I then used the Silhouette Cameo to cut the label.  The cut file is called "4 Halloween labels" and is by Lori Whitlock (#33847).  I used just one label, the one that is purple when you see it in the Silhouette Store.  I sized it to fit my Santa face, which means it is 5.260"x3.850," when all assembled.  The piece of green polka dot card stock is from some DCWV Christmas stack, I just don't know which one anymore.


The Santa face is also cut by my Silhouette.  It's cut file is "Santa treat topper" and is also by Lori Whitlock (#35075).  It is actually meant to be cut and the back part folded over a treat bag, I just didn't fold it and placed it on a card instead.  When he is all assembled, he is 3.67"x3.53."  I ran the beard and mustache through the Cuttlebug with the D'vine Swirls embossing folder and the white hat band with the Snowflakes embossing folder.  I adhered the mustache and the ball of the hat with pop-dots and I used black pearls for his eyes.  The holly berries have a little white gel pen accent and are covered in glossy accents.  I finished off the front of the card with two dark red gems on either side of the label.


I also finished the inside of the card, this is also where I put my sentiment.  The green card stock is cut at 5 3/8"x4 1/8."  I used the same label cut, in the same size, as I did on the front.  This time the shadow part is in red and the smaller inside is in white.  I then used a stamp from Fiskars for my sentiment.

Wednesday, October 09, 2013

Create a Critter 2 - Creation #3

Today's "Create a Critter 2" creation is a cute and coordinating Halloween card and treat bag.

The card is 4 1/2"x6 1/4."  I used orange card stock for the card base.  I cut the black/white patterned paper at 4 3/8"x6 1/8."  The patterned paper is from the Midnight Chic Stack by DCWV.  I used the "Elegant Edges" cartridge to create my mat.  The cut I used is found on page 51, I used the oblong and shadow features, both on shift.  I cut it at 4 1/2."  I then embossed the white mat with the Haunted Damask Cuttlebug embossing folder.

The witch turtle and cauldron are both from "Create a Critter 2" and are both found on page 56.  The turtle is the basic cut and the cauldron is the icon feature.  The turtle witch was cut at 3" and the cauldron was cut at 2."  I used Cricut Craft Room to hide the face on the turtle.  I then used a face stamp from Peachy Keen's In Stitches Face Assortment for the face.  I covered the cauldron with glossy accents.  The flames have orange peel Stickles on them, the bubbles are covered in firefly Stickles and the hat band has green Stickles covering it.  I also added some firefly and star dust Stickles to some of the patterned paper for even more glitter.  The sentiment is from Scrappy Moms Stamps, "A Haunting We Will Go."  I cut it into a banner and matted it with some orange card stock.  I added two black pearls on the ends and adhered it with some foam tape.  
The turtle witch was adhered with an action wobble for a little bit of fun.  

On the inside of the card I cut some black card stock at 4 3/8"x6 1/8 and some orange/black polka dot paper at 4 1/8"x5 7/8."  I cut some black card stock at 3"x4 3/4" and white card stock at 2 7/8"x4 5/8."  The spider is on page 53, the accessory feature, and cut at 1 3/4."  I used a white gel pen to give it two little eyes.  The sentiment and the frame around it are both from Peachy Keen, the September 2012 Stamp of the Month Kit.


The treat bag is actually a pre-made bag that I found in my craft room.  I just decorated it up!  I cut some black card stock at 4"x7," some orange card stock at 3 7/8"x6 7/8," and some more of the black/white patterned paper at 3 3/4"x6 3/4."  I tied off the top of the bag with three pieces each of mandarin and charcoal bakers twine from the Twinery.


All the images on here are also from "Create a Critter 2."  The haunted house is on page 55, the accessory feature, and is cut at 5."  I hand cut a piece of black card stock to create the "hill" that it is sitting on.  The ghost is also on page 55, the basic cut.  I used Cricut Craft Room to hide its face and gave it a Peachy Keen one.  The face is from the In Stitches Face Assortment.  I used a clear gel pen to give a little shine to its nose and tooth.  I also used a white gel pen to draw around the edge of the pirate hat to make the piping.


I used the witch turtle again, this time cut at 2 1/2."  For this one's face I used a Peachy Keen Stamp from the September 2012 Stamp of the Month Kit.  I also added a gravestone.  This is the accessory feature and the cut is found on page 54.  I sized it Cricut Craft Room to fit the stamp I was using so it was an odd size cut, but is just over 1 3/4" when assembled.  The sentiment on the gravestone is also from the September 2012 kit and is stamped in white ink.

I made this for the following challenges:
365 Cards: "Day 281" - have someone else pick a piece of patterned paper to use on your card (my husband picked the black/white background piece)
My Craft Spot: Trick or Treat
Stuck on U Sketches.: magic or witchcraft
Peachy Keen: October Release Party Challenge 2 - 3D project with Halloween theme 

Monday, October 07, 2013

A Bit of Randomness

As most of you know by now, I work at a JoAnn Fabric and Crafts store.  Well, JoAnns' stores host, what we call, "Make & Take" events.  This is where people can come in to their local JoAnn store and create a free craft to take home with them.  Lately these "Make & Takes" have been revolving around Disney.  We did a Tinkerbell one when one of her movies was being released on DVD.  Then we did one when "The Little Mermaid" got re-released.  For our next "Make & Take" we will be making a craft to go with the release of "Monsters University" on DVD.  My store manager wanted to try and get people interested in coming to this one since a lot of the "Make & Takes" we do seem to be sparsely attended.  In order to do this we made a little table display of the what the "Make & Take" will be with fliers on it for people to grab with the date and time.  She had me actually create the craft so we could actually display the finished product.  Well, this is it:
We will be making our very own Mike Wazowski!

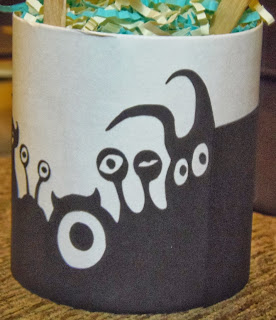
Since it is on a stick it didn't display very nicely just laying on the table.  I thought it would be nice to stick it in some Styrofoam in a pretty container.  I covered a small round box with some white card stock, then used the "Best of Pixar" cartridge to create my images.


  The black monster silhouette is found on page 54, using the icon feature.  I cut it at 3 1/2" and wrapped it around the box.

I then cut the "Monsters Inc." logo.  It is cut at 2" (real dial size).  It is found on page 41 and is also the icon and icon layer features.

My paper Mike is found on page 46 and is cut at 3 1/2."

Sully is on page 42 and is cut at 5."

I also made a little table card to go with the display.  The card is 2"x5," when folded.  I made it from blue card stock, then cut a piece of white card stock at 1 7/8"x4 7/8."  I used my computer to generate the sentiment.  The Mike I used for the card is on page 45 and is 3" tall.

If you are interested in making your own little Mike Wazowski puppet, then stop on by your local JoAnn Fabric & Crafts store on October 20th (check your local store for times).